
Now, the challenge. I use a random number selector (have I told you that before), and today it selected:
Ruth Kidd (well done Ruth, and thank you for your suggestion). Ruth has thrown these into the mix:
scraper foil
Gilding wax
Acetate
Now, I know I have scraper foil. I have been looking for it for 2 hours! haha. I've attempted to tidy as I went along, so the search wasn't altogether futile, but at the moment it's still in the elusive "safe place". I will carry on my search, and your challenge will be completed Ruth.
In light of the missing scraper foil, I decided to finished the tutorial which I started last night, instead.
We were here (check out yesterday's blog if you are not sure how to get to this stage). The gesso looks good as it is, I quite like the white. The gesso also gives us a great surface to add colour onto. In many forms. You can use your paints, inks, spritzers, glazes or waxes. The beauty of mixed media is the freedom to experiment. You can always cover it back up again if you hate it. It would even look really effective in black, with some striking gold gilding wax over the top. Play.

I went for my spritzers again. You can tell when I rediscover something - I use it constantly. This is a deep red

Until you add a little water to tone it down

I sponged off the excess water and ink, and you can see it lightens substantially

I then spritzed on some dark blue. I love the blend of the two inks. I spritzed water to tone the ink and to mix them further

I also added a little of the silver mica spritzer, just a little for a bit of shine

I then dried it all with my heat gun. Look how the colours change. I love seeing the effects you achieve once the inks are dry, they often form veins of colour which are really interesting
I decided to knock the colour back a little, to swept over some white gesso. Literally take you paint brush, load on your gesso, and sweep. Don't apply to much pressure at first, build up the gesso until you are happy with the effect

The base you pop your art piece on will change how it looks, you can see how the colours stand out when I pop it on a white base

You may want to add extra embellishments - remember you can still colour tint them so they will match. Just lay them on and see if you like the composition

I didn't like the flowers! I turned to my trusty magazine instead, and cut out the word Escape. I played around a little to decide where it looked good


And then decided to anchor the frame down with a ribbon - which I decided to run around the back of the piece.

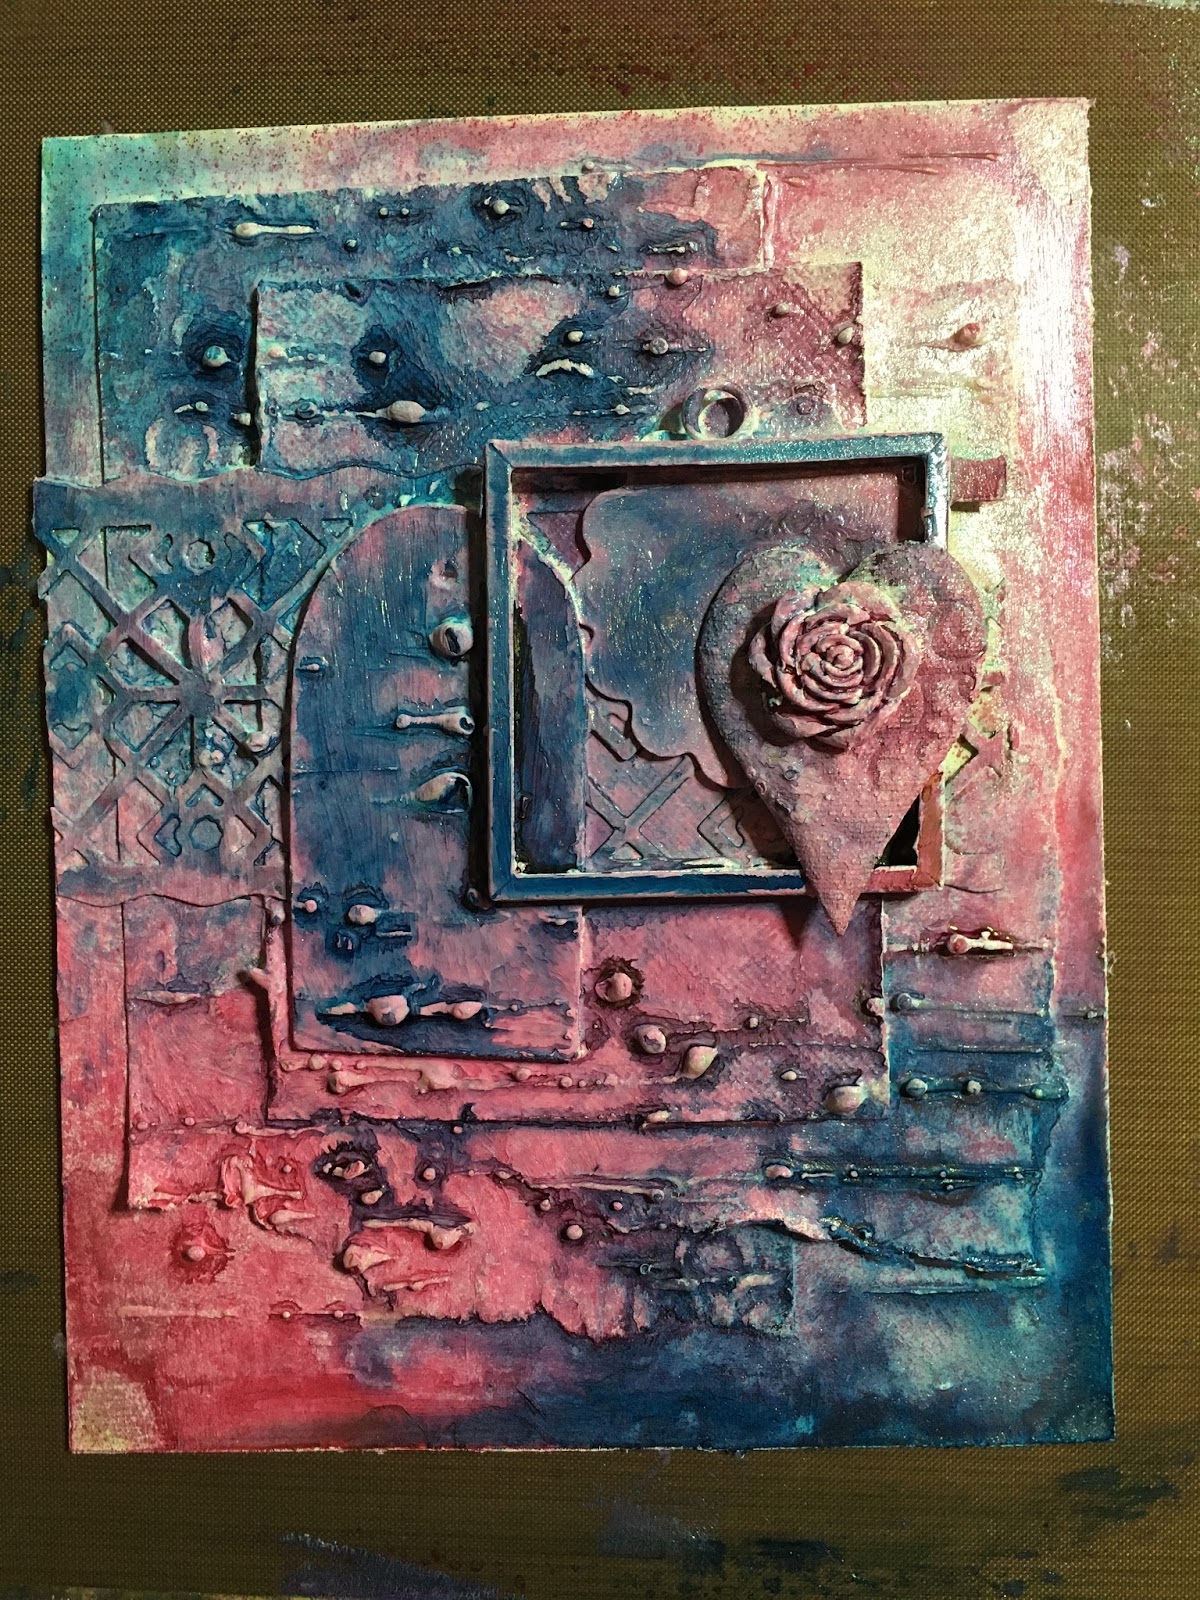
Matt and layer your piece. This is the same as you would mount your artwork - I went with a white mount, a small piece of black card and then finally a piece of white mount board

I adore the textures, and how, once it's completed, you can not tell what anything really is! Who knew it was a bit of scrap card and some glue.


I finished, and then decided to add some gilding wax - well, it is....Monday?

I hope that is helpful to those people who were stuck on how to start an altered art piece. It's so rewarding - I'm completely obsessed. Hopefully tomorrow I'll be able to attack the challenge, otherwise it's another altered art piece :)
Goodness! Single figures. These past couple of blogs have been so helpful to me. I will have a go - gesso is on the shopping list. I attempted one years ago, using black acrylic paint, so I might revamp that one, especially as I've accumulated a lot more "stuff" since then!
ReplyDeleteThanks leonie. Love it! I knew keeping all those negative pieces from die cutting would come in handy one day :)
ReplyDeleteThanks leonie. Love it! I knew keeping all those negative pieces from die cutting would come in handy one day :)
ReplyDeleteOOH LEONIE THESE LAST FEW WEEKS HAVE BEEN SO AMAZING, AND NOW ITS DOWN TO LIKE THE NASSA COUNT DOWN 10, 9, ETC... PLEASE DON'T EVER STOP.. TIA XX
ReplyDeleteLove, love, love it! And I've finally found a way to use up all those blooming papers! Thank you Leonie xx
ReplyDeleteHi Leonie.
ReplyDeleteThis is just Brilliant Thank you.
Take care Kitty.
You make everything look so easy, so achievable and the finished piece is beautiful, thankyou xxx
ReplyDeleteThis is beautiful. Thank you so much for the special tutorial on how to do these altered art pieces. Now I just have to take the bull by the horns so to speak!!!! Whatever I do it it never going to look as good as yours do. Please don't stop teaching us all.
ReplyDeleteOh hope you met your deadline and got everything sorted!
Hi Leoni, I've really enjoyed these last few mixed media step by step and ideas. Have never thought of using magazines for cut outs, great idea. Thank you. Well now down to last few days, how exciting x
ReplyDelete
ReplyDeleteHi Leonie, this is a fabulous piece, love all the textures.
How do you keep your piece so flat, mine always buckles?
Best Wishes Lilian in Cornwall
Stunning creation & am so hoping you will be back on my telly box soon. I love your ditsy presenting style!
ReplyDeleteMorning Leonie, I can hardly believe how this project started 'life', it is gorgeous !! I couldn't believe the difference in colour on your piccies before and after using your heat gun, the change was remarkable.
ReplyDeleteOnly just over a week left ........ I can hardly wait !!
Lots of love from Patricia xx
These pieces just amaze me, Leonie. I have even dared start one but now you have got me thinking.
ReplyDeleteAnne(Northampton)
Wow, fabulous. Thank you so much for the tutorial and taking the time to share with us Leonie.
ReplyDeleteSue xx
Stunning piece of art Leonie. Thanks for the tutorial, you make it fun.Not long now.
ReplyDeleteHi Leonie,
ReplyDeleteI love this, I will definitely have to give it a try. I think I may have to make a list of the things I want to try because we brought our new puppy, Coco home at the weekend and as we've never had a dog before it's quite a steep learning curve!!
Thanks for sharing,
Heather
Love it. The spritz looks amazing. You have so inspired me to get gesso and experiment 🌺
ReplyDeleteJust loving your stlye, but please don't get me started on TV nails.
ReplyDeleteI would far rather see inky nails and know you craft than TV nails that say sell,sell,sell.
At least you have dropped a big hint about being on TV so thats good news for your many fans.
MFM xx
Another super project Leonie and a lovely picture at the end. Thank you. Best wishes Jackie x
ReplyDeleteThese are fantastic!!! I have never tried this b4... Can you please advise what gesso you used to cover...
ReplyDeleteWOW these are fabulous! Love the design and texture.
ReplyDeleteHugs
Linda xxx
Am definitely going to give it a go now. You really have been inspiring. Hope you manage to keep up your blog when your new life starts. Love Jan
ReplyDeleteAm definitely going to give it a go now. You really have been inspiring. Hope you manage to keep up your blog when your new life starts. Love Jan
ReplyDeleteEnjoying the count down, will we see you on air or will you be able to tell us we're we can see your smiling face next. It's such fun seeing you shine creativity again. Doing what you do best with inky fingers , crafty hugs julie x
ReplyDeleteAbsolutely love this piece. I've quite a bit of catching up to do on your blogs. Had a very busy week. It's terrible how work and life in general gets in the way of crafting. Ha ha
ReplyDelete