Showing posts with label Egg Shell Crafting. Show all posts

Tuesday, 26 January 2016

Oh Gosh, only 22 days!!!

Another day almost gone! 

I'm sorry, but I just had to crack on with the egg shells!  I just wanted to see how they would look if I used resin, so that was the challenge for today.

I did give my piece from yesterday a spray with Crafters Companion Spray Shine, again to see how it would work.  And the glossy accents has dried, so I took a couple of extra photo's.  If you do want to see how these are done please see yesterdays post:


I definitely prefer this one with a shiny finish.  It would make a good jewellery piece now.  I think it needs soldering around the edge, and maybe a bit of fancy wire work on the front...that will be up to however wins the piece :)


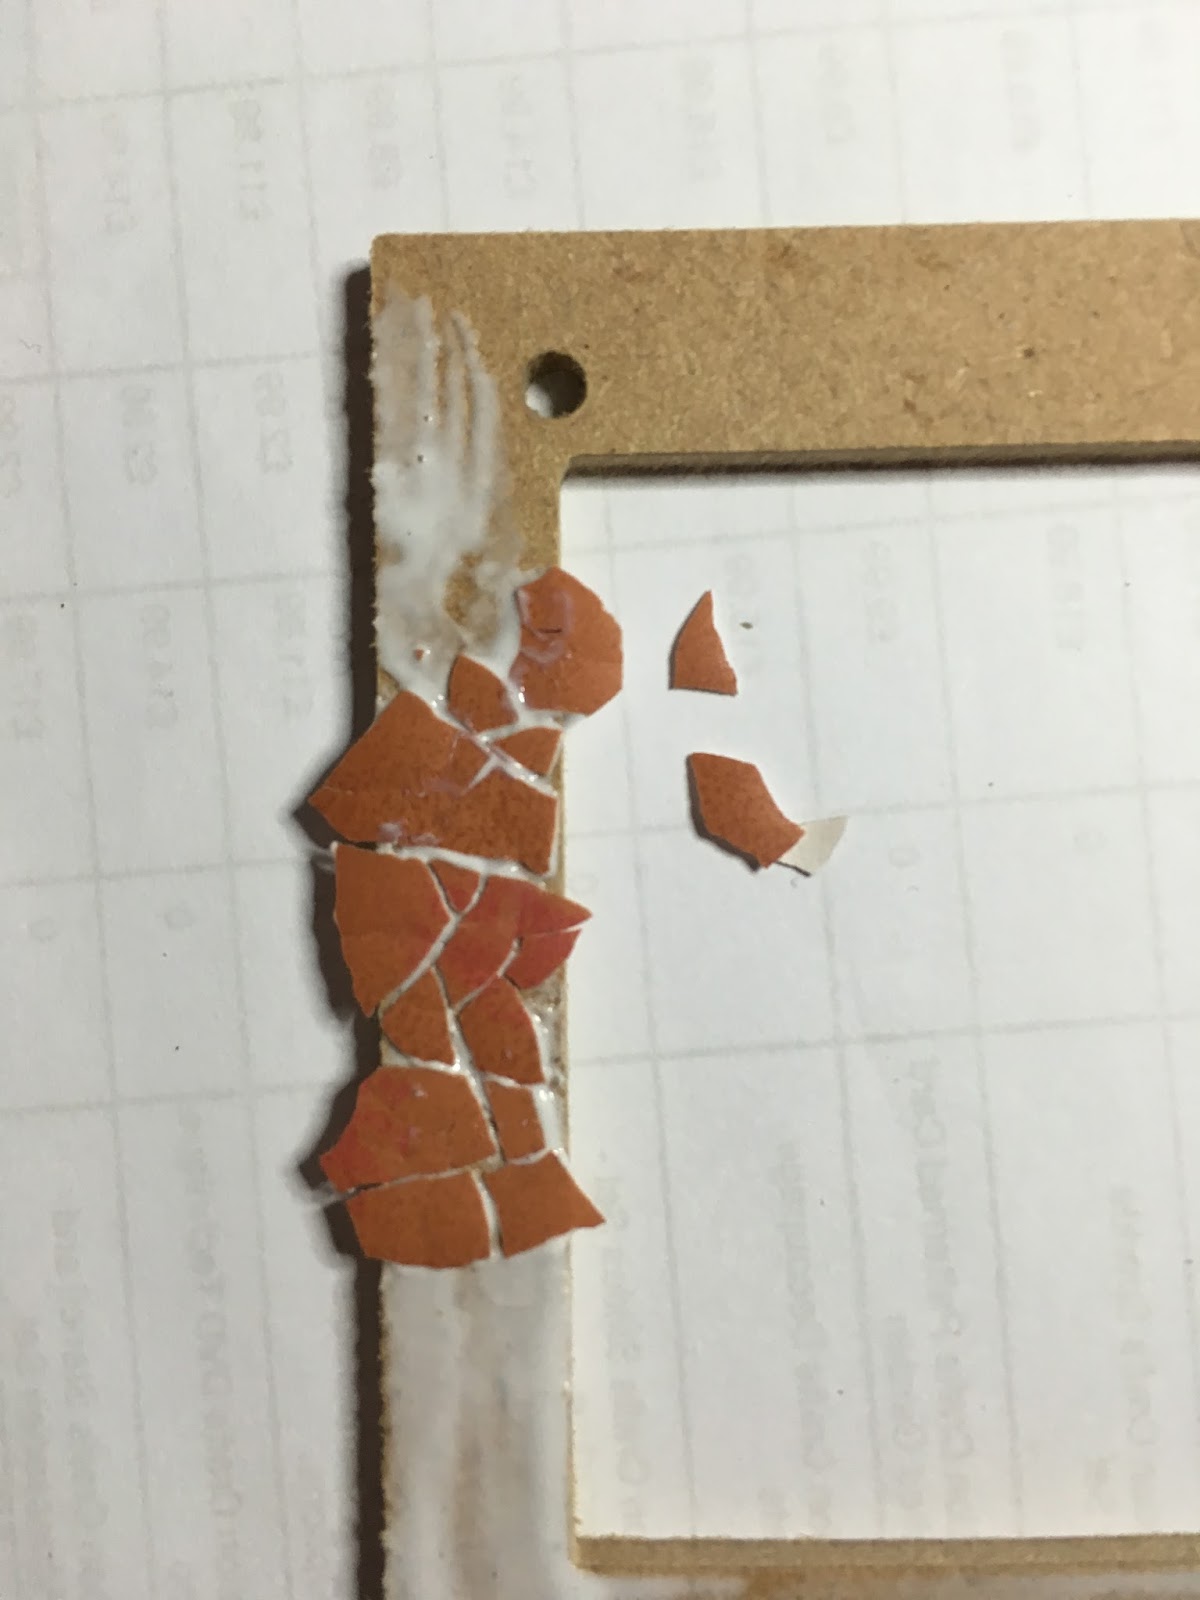
Now, onto today.  I decided to use a couple of elements from Spellbinders.  I like these, they are very substantial, so feel expensive.  The first one I added glue and then shell directly to the metal:


I used the same glue, which worked perfectly.  This is the one from Debbi Moore.  If you have Cosmic Shimmer, this will work as well


I used exactly the same process.  I just make sure the shell went up to the edge and in the corner, as possible


I then dug out the alcohol inks, and just added colour.  I didn't take a picture of the finished piece after the colour, sorry!


I raided my jewellery, and old watch parts which I bought off ebay yearts ago - and have been hording as they are so beautiful - I'm letting go!  Quite cathartic. I arranged the elements before adding my resin


I haven't used resin much at all (maybe once on air with Sarah!), so this was an experiment - and me being me, I didn't bother reading anything other than the basic instructions.  I mixed the resin, and then added to my piece.  I love the way it settles and domes.  It does take around 6-8 hours to harden, so I will have to leave them before I show you how they look tomorrow


The second one, I backed the inside with a thick piece of card before applying the shell - just to see if this made any difference.  It didn't really to be honest.  When I had finished, I used the same paints as yesterday - these are the Crafty Notions paints, I adore the colours.  I also added a layer of Mod Podge when complete, just to ensure everything is glued and sealed


Thought I'd sneak this one in - no windows!!  It's tricky working today - it'll be worse tomorrow as it's my craft room :(


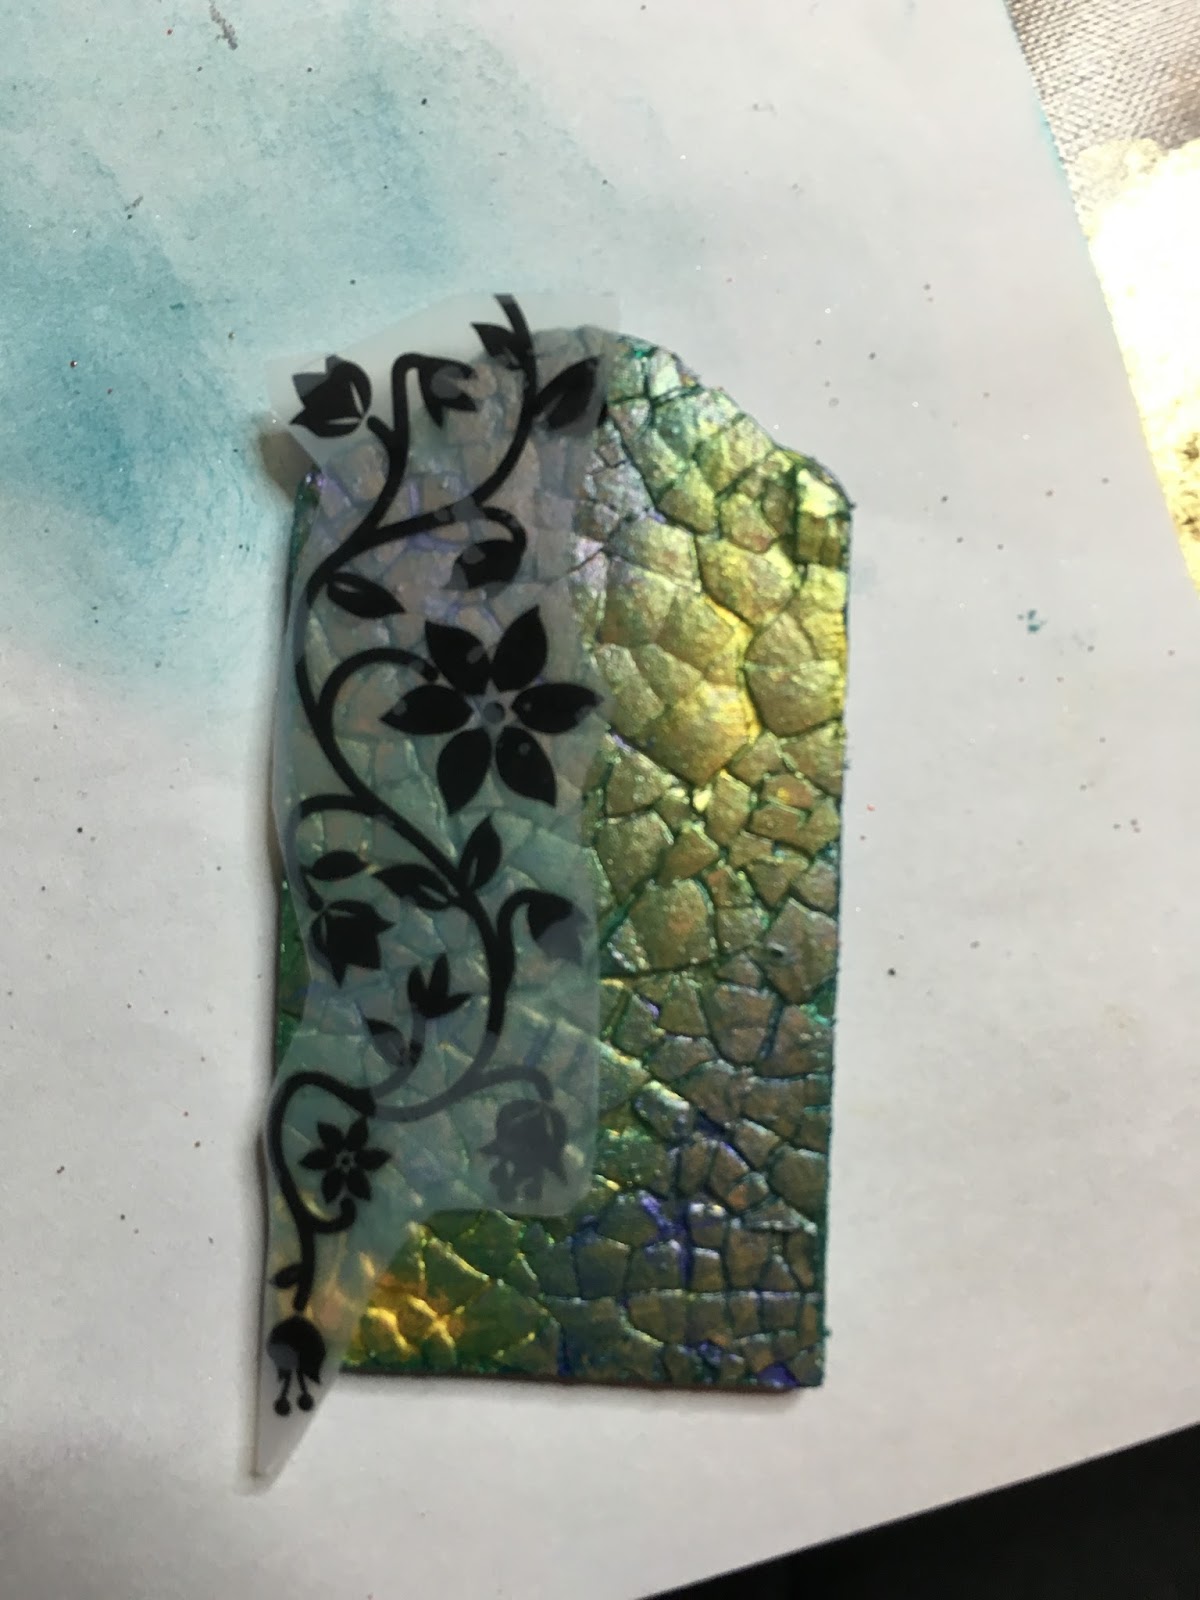
I added some white dots, and then decided to see if I can stamp onto the tile.  It was one of those moments - you know, you are happy with the piece and know this could ruin everything


I used StazOn, you can stamp on it, but the surface isn't even, so just be aware of that


I then decided to add the resin - but couldn't resist seeing what it would look like with pearls dropped in!


I just need to leave them to set, and show you the results in the morning.  As I had made up all my resin, I had to use the left overs, so added stuff to my mould.  The top left is a piece of fimo, see what that looks like


The next one I mixed black glitter and silver stars


I then added quite a lot of gold leaf, and silver stars


Okay, we have to wait!!  I like this, and then doing the big reveal tomorrow.  Fingers crossed one of them turns out okay.


Monday, 25 January 2016

The crafty countdown - 23 days remaining!!

Blimey.

Had the haircut today.  Now need to sort the nails.  Oh good grief.  The nails.  Currently they look like I've been digging for potatoes....

Tonight, I had to carry on playing with egg shells.  Who knew that would become an addiction.  I wanted to play with different paints to see the effects.

I found 2 MDF pieces, one I painted black, the other I left, and started covering with the egg shell (please refer to yesterdays post for instructions how):


The first one I coated with Mod Podge to glaze and seal it, to see if this would make a difference


I then used stunning paints from Crafty Notions.  I needed the smallest touch of paint to get this incredible lustre


The second piece, I used Pebeo gilding wax.  I found the results were better if I dabbed them on as opposed to rubbing them on


I then decided to see what would happen if I added embossing powder.  I inked the tile up with Versamark, and then covered with clear Ultra thick embossing powder, and melted with my heat gun


I added 2 layers of the clear embossing powder, and then got a lovely blue powder ready.  When I was melting my 3rd clear layer, I sprinkled the blue.  I did this whilst the clear layer was hot and molten - this results in the blue powder beginning to melt on contact.  I still had to give it a blast with the heat gun to make sure it was thoroughly melted


I then added a little red, and a little green.  Add the embossing powder as though you are spinkling a little salt - this allows you to layer the colours and stop when you are happy.


The first tile has been drying. I then applied a lovely rub on, which adhered beautifully


Doesn't it look good.  Yep, wish I'd left it there.  But no, I have to carry on.  I wanted to add glaze, so I decided to try the StazOn GlazOn.  However, the bottle was playing up, and wouldn't flow properly, and when I did manage to make it come out - it was full of air bubbles.  It looked a mess, so I had to sponge it all off :(


You can see the texture sponging the glaz off has created.  It also pulled off some of the paint, annoyingly


I added a little more paint, and removed any excess that covered the rub on.  I then added a thick layer of Glossy Accents. 


This is a photo of the embossed piece.  I'm going to leave it as is, and then whoever wins the pieces will be able to decide what they would like to do with it


I love the colours of the embossing powder


I edged the piece with gold gilding wax, which finishes it off beautifully


The other tag is now waiting to dry.  I managed to add  a little gem just in the centre of the flower


You can see the depth of the glossy accents


I'm looking foward to seeing how it dries.  Lets hope I've put it out of the dogs path!!


Sunday, 24 January 2016

24 days _ Crafty Countdown. Playing with Egg shells.

Honestly, playing with egg shells.  This is what I love about the challenge.  It makes me use something I would never have imagined adding to my crafty stash.  And I have absolutely loved this technique.  You have to try this.  So easy.  So effective.  It started with scrambled eggs, and then the shells were left to soak overnight.  This is interesting, the plastic cup I soaked them in disintegrated! You can see from the photo how it has essentially cut the plastic in a perfect line!  It's okay, the egg shells were fine.


I cleaned the solution from the egg shells, and peeled off the membrane inside the shells.  I then decided to use the tissue part of the challenge.  I also decided to use this GlazOn from StazOn.  I've never used this before, so thought it was a good time to experiment


I applied a layer of glaz to a piece of acetate


And then sprinkled mica flakes


and gold leaf


I then ripped and scrunched pieces of tissue paper which I stuck into the Glaz.  I added Glaz on top of the paper where necessary, to make sure it's completely stuck down


Now, leave this to one side to dry


I decided to use a MDF frame for my egg shells


I used acrylic adhesive, this is one from Debbi Moore.  I just did a little at a time, as the glue is strong, and quite quick drying.


Take your egg shell and lay it into the glue.  Then squash it down onto the frame


It cracks, and basically gives you an instant mosaic!  How cool is that.  I used a cocktail stick to move it round and spread the shell out where required


It comes together really quickly.  Don't worry about the glue being to thick, just try not to let it spill all over the shell


Even before it's painted I think it looks good


I had a look at the colours on the acetate sheet, to help me decide what colours I needed to use for my frame


I decided for warm reds and brown tones.  I then added my alcohol inks.  I haven't use these in such a long time.  I love the way they move and spread


I used a nice red, butterscotch, and a brown.


I must admit, the colours arn't captured in the photo.  They are very effective


I checked the background again, to make sure it looked okay.  At this stage I was still unsure whether to use my background on the smooth shiny side, or the textured rough side


Next I took a little wood heart


If I add alcohol ink directly to it, because it's so porous, the ink just sinks into the heart.  Apply a sealant to allow the alcohol ink to move and blend.  I used Mod Podge.


The last item in the challenge, was rub ons.  These are an old product, and Sheila was right, I've got some!  The are still really creamy and worked beautifully.  They are very similar in application and the results, to gilding wax


This is the frame before


And this is after the Rub Ons.  You can see the sheen.  You can see from this photo, I have also decided to go with the textured side of my acetate, and backed my frame onto black card


Now I started to layer.  I popped a die cut


Then string


Some more foliage die cuts


And then I found a lovely button.  Of course it needs alcohol ink.


I added this to the corner with Pinflair glue gel


I also added my wooded heart, and a little piece of lace 


I dug out a spiral, and stampled the word love.  I edged the card with the rub ons, and glued in place


And then changed my mind - and moved it.  I also stamped Life, which I added on.  I then decided to add Glossy Accents to my frame, heart and sentiments.


I added wire to the top of the frame, so it can be hung.  And a few wire coils inside the frame.


Egg shell mosaic.  Who knew it could be this cool!!  Thank you for the challenge Shelia, if you send your address to me I'll get this in the post for you.  My email address is leoniepujol@hotmail.co.uk