Tuesday, 8 December 2015

The countdown!!

70 days to go!! Not that I'm counting - but I've 70 days before I can start work again. February does sound like such a long way away doesn't it...but time does fly, and I will be starting the job before I know it. I thought I would set myself a little challenge and attempt to do a blog post each day - with a finished ATC. At the end of the 70 days I'll give away the ATC's I have made, not sure how yet, but I'll think of something.

I'm allowing myself to "play" with anything. It may be craft stuff that's been in my stash for years, it may be something nice and new. I'll attempt to mix it up.

For my first day I decided to work with wonderful fusible fibres. Angelina fibres have always been a favourite for me, and there's so many ways of using them.

I'm using a pack brought to us by Clarity - look at the big box of colour!!

First take a small amount of the fibres from the box and "mix" them together. Spread the fibres out on a piece of paper - keep it fine to create a delicate sheet

Cover with another piece of paper and then iron. The fibres fuse together with heat - and you don't need too much heat! If you iron for too long you can burn the fibres. A fine layer like this will fuse in a few seconds. Always cover the fibres before you iron, or you'll get a sticky iron! If the fibres arnt fused properly they will still feel "fluffy". Simply cover and iron again.

Sorry about the lighting on my photos, the lighting in my room is terrible!! I had to unplug my daylight lamp for the iron!

Anyway, try this. Create a cone with a piece of card, and wrap the sheet you have created around it

Allow the sheet to overlap, as you are going to fuse this together. Cover the part where the fibres join, with paper, and gently iron. The fibres will fuse giving you a cone shape. I ironed mid air, as it will fuse quickly so isn't to awkward.


This would make a lovely Christmas tree, or, as I did, make a lovely Christmas decoration. I've just added wire and beads


Next, take a rubber stamp, make sure it's one which will with-stand heat. I've inked the stamp up with versamark. You then need a clump of fibres. You will need more fibres for this as you are making an impression, so need depth in order to do this. The stamp I'm using is an old favourite of mine from Crafty Notions:


Pop the fibres on top of the stamp, and cover with paper


Again, apply the iron. You will need more heat this time, and always avoid using steam!

When it is done, the image will be indented into the fibres. I love this look. Some stamps suit this technique more than others. You can use different colour ink to ink up your stamp, use different colour fibres, or even colour the fibres with a permanent pen. If it hasn't fused properly it will, again, feel fluffy and won't have picked up the detail properly. Over heated, and it will have gone a little dull:


I used gold pebeo gilding wax over the top of my fibres, just gently brushing it over the image so it hits the top of the image. I then finished the card by adding it to a black card, and popped on a word stamped topper


One day down....are the bets on for how many I get done!! gulp :)
Xx


Tuesday, 5 May 2015

Easy Card Making Ideas

Back, actually still blogging in the same year as my last post.  Boom!

On TV we often chat about how myself and Anne-Marie are going to bring in the Paper Police for the mis-use of Hunkydory cardstock. Now, whilst this is a joke (sort of), I thought rather than keep threatening people, it might just be nice to show an example of how we can use one piece of card for multiple looks.  I have started easy, and progressed to a trickier, but still completely do-able set of cards.  It's going to be a long post - ready?.....

Lets start...

We need to start with the chosen piece of cardstock.  I went for this as I can already imagine it as two separate cards.  

The first card I made was literally just by folding the card in half: 


Sorry, the picture isn't great is it...The card is folded and then I have literally only added 3 different toppers.  Use 3D foam to create dimension.  Layering the toppers adds interest to your card.  I haven't even added mat and layering to my toppers as each one has a foiled border.

Next, I cut the main piece of card in half, so I could now create two very simple cards.  Use plain cardstock as a base - I used a pearlescent card so it complemented the finish of my main cardstock.


I haven't used a mat and layer for my main image, just to keep it as simple as possible.  If you wish to add an extra layer of card, place this under the decorative card layer.  Choose a colour that you can pick out of the main image. You will need to cut the decorative card down a little - I only ever show a very small mat and layer border.  Play around to see how you prefer yours.

With this card, I have added a topper, which I have mat and layered.  I added a larger piece of gold card, and then a piece of turquoise card.  This was just slightly bigger than the gold card, so giving that lovely small border.  I added a mat and layer to the topper to lift it from my main image - otherwise it would get lost into the highly decorative background.  I then added another little sentiment.


The second half of the decorative card was added onto a plain pearlescent card, with a couple of toppers added on top.  As I wanted to use a larger topper this time, I covered the bird on the cardstock, so the topper looked correct.  Again, add 3D foam for dimension.

Okay, they have been really nice and simple so far, literally just cardstock and toppers.  Next we need to get handy with our scissors or craft knife.


I really have leaped onto cutting and changing the cardstock now, but it's still very simple.  I used the half of the card with the bird and pink panel.  I cut the card down into a panel, cutting up to the bird, and around it, so it is coming out of the card..  The design of the card allows you to see where this is an obvious place to cut into your image.  Essentially, I have cut away the pink part of the card.  I then used another piece of plain pearlescent card as my base cardstock.  I cut the front of the card down, so it was just a little larger than the decorative panel.  I used a piece of turquoise card to mat and layer my panel onto, and attached this onto the front of my card.  


The topper I used on my original card, I now decided to cut up.  I cut out the postbox, which I added to the front of the card with 3D foam.  I also cut out the bird, butterflies and some of the letters.  I glued the bird and some of the letters to the front of the card.  I used Pinflair this time, as the images are smaller and the Pinflair allows me to angle the images rather than them remaining flat, which happens with 3D foam. 


 I also cut out two of the foiled swirls, and added on to the top left corner.


I then used one of the inserts from this Hunkydory collection.  The insert is also pearlescent. Although the insert isn't precisely the same design as my main cardstock, this doesn't matter, as the colours blend wonderfully.  I used the half of the insert that didn't have the sentiment printed on it.


I added the main topper, which I matted and layered onto turquoise card, this lifts it off the insert. The flat topper will sit under the front of the card.  The further two toppers are added to the card with 3D foam, this will sit to the right of the card front. I added a couple of little butterflies on the right side, and also one of the foiled corners.

I finished the card with a little bit of Stickles glitter glue, I used gold and Diamond, on the flowers, leaves and the bunting.

The second half of my card (can you believe, the main images are still from one piece of A4 card!).


I used the insert which matched the letter box from the cardstock.  I cut the insert down, along the line of flowers and the letterbox.  I then glued this to the front of my pearlescent card, landscape.  I then cut along the image again, this time through the pearlescent card.  Make sure you keep a section at the top complete along the fold, to form the body of the card.  I then cut down the excess pearlescent card to the right, so the front of the card will just overhang the back of the card slightly.

Using the card, I cut out the postbox, some of the flowers and some letters, which were decoupaged onto the front of the card. I added a little Stickles Glitter Glue.


On the inside of the card I used one of the matching inserts, which I cut down so the bird was at the top.  I cut some paper from one of the other inserts, which I matted and layered onto a piece of pearlescent card.  I also added the foil border, and a sentiment.


A little bit of glitter glue, finishes my last card.

This is why I love kits like the Hunkydory kits available.  You can make the easiest card ever, or you can really play, and create something completely different.  

Happy days.


Sunday, 19 April 2015

CHA Creative exchanges - part 2

I survived my first ever "keynote speaker" gig!! Whoop whoop. I was so nervous I thought I was going to cry. But I didn't. I think my lucky mascot helped me through, here's a pic:


Thank goodness for poldark!! 

I had a really really good day. I learnt new hints and tips from the seminars, saw lots of crafty friends, and made new ones. And was reminded, yet again, why I love this industry. I love the diversity, passion and energy. I'm so glad i eventually joined the CHA, and hope to be much more involved in future.

I based my talk on how I believe craft gives us freedom and escape, and how lucky we are as teachers and demonstrators to have that skill that we can pass on. I also babbled about how I came to find myself chatting away on tv.
I hope it went well. I didn't faint/cry/run or even have a made flush - so that's a winner.

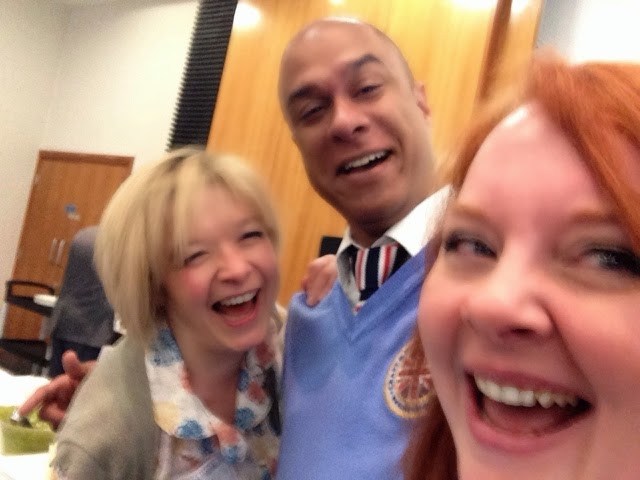
I'll share a few photos of some of the lovely people I bumped into:

The lovely, and very talented Sara Naumann


Jenniffer Taylor - THE dress. Jenniffers first sewing project - her own wedding dress!! With hand made lace. Amazing.


Jenniffer Taylor her very self :)


Okay, I'm going to keep saying talented!! Of course everyone is - it was a CHA meet up :) Sarah Hurley is talented and funny. Great seminar. Craig de Souza was brilliant as ever. 


Hehe, Suzie Candlin - making sure she kept hold of her fabulous coat when I was around!! Caught busy ironing the onesies 


#sewingrevolution Jenniffer Taylor spreading the word


The lovely Linda (congratulations again Linda) 


And last, but absolutely no means least, the wonderful Fiona :)


CHA Creative exchanges

I'm up bright (???) and early as today is the CHA UK creative exchanges day. I'm really looking forward to it. There are seminars from various bods in the industry, and it'll be a fantastic opportunity to meet up with old crafty friends, and no doubt meet new ones.

We're going networking, don't cha know :)

Scarily, I'm the keynote speaker! By Jove, how am I going to talk for 40 minutes!!

Where's the club VT....magic hands, where's magic hands.

I'll try and get some snaps from the day to share.

Friday, 17 April 2015

Staz on stamping

Good evening folks. I'm blogging when I should be sleeping! It's early, but I'm whacked this evening. I've had a smashing couple of days at work. We had our 12th birthday at c&c - which lead to lots of cake eating. Had some smashing shows though, and it has been a great excuse to dress up.

I got home to be greeted by quiet dogs. This isn't a good sign. They normally bark as soon as they hear the gravel on the drive. Quiet dogs mean a surpise awaiting. Funnily enough, they arnt great at leaving good surprises.

Dylan hasn't been very well, he has a dodgy belly - which meant lots of cleaning. It took hours!! Poor little dog , I hope it's something of nothing - he's curled up by my feet now - smelling much better (oh yes, the cleaning included washing the dog!!). Poor love.

Anyway, after all that, ive decided to do a quick post this evening. I'm sharing another project (or part of one), that I did for Cardmaking and papercrafts.

I used white staz-on, stamped on acetate. I coloured the reverse of the image with cosmic shimmer pva.
I love this technique, as you don't need to worry about staying in the line, as when flipped over, the image looks perfect. I also adore the look of the pva on acetate. Mix your colours on the acetate, when they dry they give a fantastic marbling effect.


I have attached one image on a white background, and the same again but this time on black:


The other fabulous point about this technique, is the ease at sticking the acetate to the card. The pva is not only colourful - but remains a pva, so allows you to stick your image down , without a problem.

Okay folks, that's me done and off to bed.

Goodnight :)

Tuesday, 14 April 2015

MDF Tag

Almost on a roll, two postings in a week!!  Lets see how long this lasts.

Well, had a lovely day today, the sun has been shining and we went for a lovely walk with the dogs.  They're now stretched out sleeping - and smelling to be honest. I'm now catching up on Poldark - smashing chap wouldn't you say. Smashing.

Now then, be still my beating heart and get back to the crafting...

Tags, that was it.  Tags.  So, this is a piece I did for Crafts Beautiful a little while ago, but I thought I would take photos so you could see it in greater detail.


I used a MDF tag from The Dreamees, fantastic value for money, and really easy to decorate.  I also used one of the Dreamees CDs for the papers.  I printed a couple of sheets off and glued one to the bottom, the other to the top.  I applied paint to the edges and the sides of the MDF.

I then stamped, using a Dreamees stamp, once on the MDF piece, again on white card, and then onto a scrap of the pink poldark....sorry, POLKA DOT paper :) I cut out the bottles and glued them over the top of my image.  I cut out the rose and leaf, and popped them aside for a moment, and then I cut out just the labels from the polka dot paper.

The bottles and rose were coloured in using Spectrum Aqua pens,

Next I tied some of the Dreamees lace around the tag, and added some jute cord for that natural finish.  I stamped a butterfly which I cut out and glued to the boy, together with the With Love banner, which I stamped onto plain card and inked the edges.


I decoupaged the rose onto my tag, overlapping the lace.  I used Pinflair glue to attach the rose.  I then added my finishing touches.  I used glaze on the bottles, and added a little sprinkle of mica flakes to add a subtle sheen.

I love making things like this, they are easy, and make a brilliant gift idea.

Okay, back to Poldark - maybe I should just watch it again in case I missed anything.


Sunday, 12 April 2015

Interactive cards

Well, where have I been!! I've deserted my blog for such a long time. It's not that I haven't thought about it - this happens a lot in life though doesn't it. We think about doing, saying, being - but putting that into practice can be tricky. I have a tendency to completely forget. If something doesn't get done when it fleets through my mind...then the chances are it may not get done. I write lists, and then fail to remember I have a list to check.  Oh hum. I remember the important stuff, brush teeth, feed the dogs, so it's all good.

I wanted to share a card I made with you. We recently did a "book club" show here at c&c, and I was very lucky to be able to take the books home and peruse at my leisure. I adore books, and have a particular soft spot for all craft books. I own many, and find they help feed the imagination. I decided to attempt a couple of demos for the show, one I managed to do, the other I had to leave - until now :)

The book is:
Really nice book, very highly recommended.

I haven't given you measurements (I don't do measurements, and the book will give you those), but I have taken photos of the process.


Start by picking your card, I have used some lovely hunkydoray card. Choose the part that will be the "moveable" element and cut 3 sides leaving an equal border on each side:


The next piece of card will be the "slider" element, and you need this the width of the aperture you have created above:


Create a topper for your moving element, and glue it to one side of the score line only - otherwise it will not move. You then attach the slider to the far side of the moving element, as you can see here:


The moving element is stuck to a mat and layer using strong adhesive, and then this can be attached to your base card, leaving enough room for the sliding element.  

Decorate, and viola:
 If you want it "proper posh", then include and insert which I have added extra butterflies and cosmic shimmer pva for a finishing touch.

And then, playtime with the dogs :)