Showing posts with label gesso. Show all posts

Monday, 8 February 2016

9 days of the Crafty Countdown!!!!

Wow, we're in single figures - and my nails are not looking telly worthy!  Presently they are covered in paint, glue and ink - and I've suddenly realised I seem to have broken every nail.  Some things don't change.

Now, the challenge.  I use a random number selector (have I told you that before), and today it selected:

Ruth Kidd (well done Ruth, and thank you for your suggestion).  Ruth has thrown these into the mix:
scraper foil
Gilding wax
Acetate

Now, I know I have scraper foil.  I have been looking for it for 2 hours!  haha.  I've attempted to tidy as I went along, so the search wasn't altogether futile, but at the moment it's still in the elusive "safe place".  I will carry on my search, and your challenge will be completed Ruth.

In light of the missing scraper foil, I decided to finished the tutorial which I started last night, instead.

We were here (check out yesterday's blog if you are not sure how to get to this stage).  The gesso looks good as it is, I quite like the white.  The gesso also gives us a great surface to add colour onto.  In many forms.  You can use your paints, inks, spritzers, glazes or waxes.  The beauty of mixed media is the freedom to experiment.  You can always cover it back up again if you hate it.  It would even look really effective in black, with some striking gold gilding wax over the top. Play.


I went for my spritzers again.  You can tell when I rediscover something - I use it constantly.  This is a deep red


Until you add a little water to tone it down


I sponged off the excess water and ink, and you can see it lightens substantially 


I then spritzed on some dark blue.  I love the blend of the two inks.  I spritzed water to tone the ink and to mix them further


I also added a little of the silver mica spritzer, just a little for a bit of shine


I then dried it all with my heat gun.  Look how the colours change.  I love seeing the effects you achieve once the inks are dry, they often form veins of colour which are really interesting


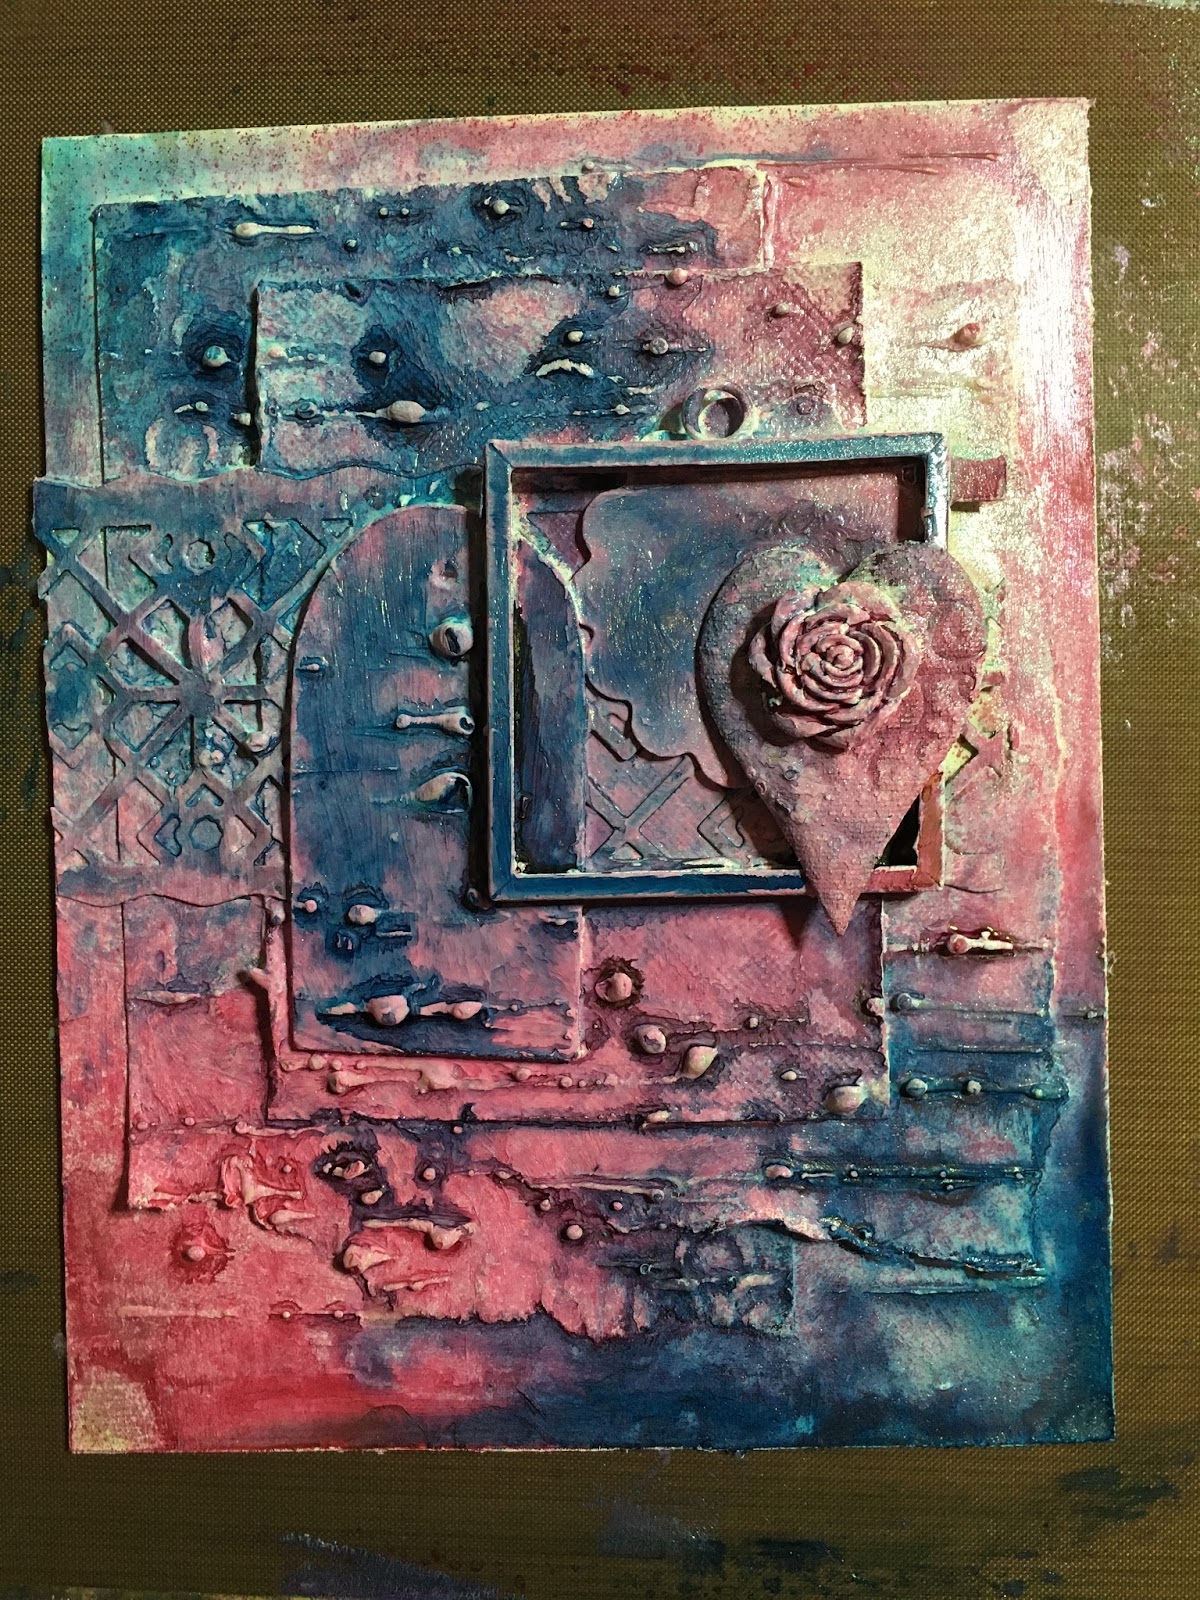
I decided to knock the colour back a little, to swept over some white gesso.  Literally take you paint brush, load on your gesso, and sweep.  Don't apply to much pressure at first, build up the gesso until you are happy with the effect


The base you pop your art piece on will change how it looks, you can see how the colours stand out when I pop it on a white base


You may want to add extra embellishments - remember you can still colour tint them so they will match.  Just lay them on and see if you like the composition


I didn't like the flowers!  I turned to my trusty magazine instead, and cut out the word Escape.  I played around a little to decide where it looked good


And then decided to anchor the frame down with a ribbon - which I decided to run around the back of the piece.


Matt and layer your piece.  This is the same as you would mount your artwork - I went with a white mount, a small piece of black card and then finally a piece of white mount board


I adore the textures, and how, once it's completed, you can not tell what anything really is!  Who knew it was a bit of scrap card and some glue.


I finished, and then decided to add some gilding wax - well, it is....Monday?  


I hope that is helpful to those people who were stuck on how to start an altered art piece.  It's so rewarding - I'm completely obsessed.  Hopefully tomorrow I'll be able to attack the challenge, otherwise it's another altered art piece :)

Sunday, 7 February 2016

10 days to go everyone. 10 days.

Hi folks.  First, I need to apologise.  I'm not going to be able to do the challenge today - rubbish arn't I.  I've a good excuse, I have a deadline tomorrow, and still working on it this evening.  I'll catch up with the challenge, so your wonderful suggestions haven't been made in vain.

Instead, quite a few people have said about the mixed media projects being tricky where to start, and how to start, so I thought I'd do a quick post regarding that.

First, mixed media looks daunting, but it certainly doesn't have to be.  And don't worry about over planning.  Collect some goodies together, and get gluing.  I wanted texture, a variation in layers, and a focal point.


Texture.  I love embossing folders, and this is a great way of using all your scraps, and any embossing folders


Scrap paper.  I tore it so I had texture


Card, I scratched the edge to add texture 


I used a die cut, for detail


This die cut is lovely, and just gives us a different shape


Next I added a lovely metal frame


Changed my mind, and popped a tag made from mount board


Then I added my focal point, this is a padded heart


To add to my focal point, I've added a pretty acrylic rose


For further texture, I have added Tonic Nuvo drops, these will dry raised.  you can use regular glue, cosmic shimmer PVA - just experiment.  I've literally just added it on in lines.


Rather than wait for it to dry, I decided to blast it with the heat gun.  This is really cool as it bubbles and looks even better!


Next, cover with gesso.  I've put a big blog on the piece


And just spread it round!  I've worked it into all the gaps, and covered everything.  However, you don't need to put it on too thick, if there's something you want to see a highlight of.  It already looks different doesn't it! 


Obviously, you can use anything.  Next I decided to use paintbrushes, this time I've got a plan!!


I've progressed in the same way however, texture


Texture, with string


And hessian


And then the paintbrushes


And then, gesso.  


Gesso, not only whitens everything for us, and gives us a great base to add our paint and colour, but it can add texture.  If you apply it in different directions, you will see the brush marks.  I've also scratched into the card


I'm going to leave everything to dry properly, and then tomorrow I can colour and also hit the challenge :)

Friday, 5 February 2016

The craft countdown now stands at 12 days - and my obsession continues

The obsession with this altered art malarkey has really taken hold - had to do another one today...just had to.  But, before I started I had to tweak yesterdays piece, as I wasn't completely happy with it.  The heart and the little bird needed bringing out a little, so I added red to my heart, with a touch of glaze, and the bird I edged with black paint, and added a dot of black paint in the eye, much happier with it:


And now for this evenings creation.  I started in the same way, just sticking stuff on.  I don't really plan, just see when it looks like - rip stuff off if I feel it doesn't work, and add other things on where necessary.  I love seeing how different it all looks as soon as you have coated it with white gesso


I've added a piece of embossed card first, and then a piece of punched card in blue, a crochet ribbon and a grosgrain piece of ribbon.  Different ribbons will give me different textures.  I've popped plain card, but I've textured the edges.  I've added wobbly lines of cosmic shimmer PVA - this dries raised, so will give me texture.  I added MDF tag and hearts, a butterfly and bits of circle card, with PVA dots on the top.  I also added some string.  Finally I stuck on two large paper flowers.  Leave it to dry fully


When all the elements were dry, I coated the piece with white gesso.  I popped an acrylic flower in the centre of the paper flower, and then a cool Love die cut, which I found knocking about.  I love that, even after it has been covered with gesso, there is still a hint of blue and pink. I then used a brush to dust on distress ink - I think I used Scattered straw (not sure though!!).  I didn't add to much, it was just to highlight the textures created.


The base card already had paint on from an earlier craft creation, so I added a little distress ink on the top and bottom, to bring the colour at the side in. I also added a little Pebeo Gilding wax.  That stuff is lethal - it's just to good!!  I did manage to stop and walk away from the wax


I took a few photo's, and then decided I didn't like the acrylic flower.  I had a little rummage, and managed to find a beautiful large acrylic flower.  I coated this in gesso, and then added to my piece.  


So happy with this, in fact, this is definitely my favourite.  I would actually pop this in a frame and hang it - which I don't normally say about my finished pieces.  I can see me making a few of these every week :)