Showing posts with label spritzers. Show all posts

Monday, 8 February 2016

9 days of the Crafty Countdown!!!!

Wow, we're in single figures - and my nails are not looking telly worthy!  Presently they are covered in paint, glue and ink - and I've suddenly realised I seem to have broken every nail.  Some things don't change.

Now, the challenge.  I use a random number selector (have I told you that before), and today it selected:

Ruth Kidd (well done Ruth, and thank you for your suggestion).  Ruth has thrown these into the mix:
scraper foil
Gilding wax
Acetate

Now, I know I have scraper foil.  I have been looking for it for 2 hours!  haha.  I've attempted to tidy as I went along, so the search wasn't altogether futile, but at the moment it's still in the elusive "safe place".  I will carry on my search, and your challenge will be completed Ruth.

In light of the missing scraper foil, I decided to finished the tutorial which I started last night, instead.

We were here (check out yesterday's blog if you are not sure how to get to this stage).  The gesso looks good as it is, I quite like the white.  The gesso also gives us a great surface to add colour onto.  In many forms.  You can use your paints, inks, spritzers, glazes or waxes.  The beauty of mixed media is the freedom to experiment.  You can always cover it back up again if you hate it.  It would even look really effective in black, with some striking gold gilding wax over the top. Play.


I went for my spritzers again.  You can tell when I rediscover something - I use it constantly.  This is a deep red


Until you add a little water to tone it down


I sponged off the excess water and ink, and you can see it lightens substantially 


I then spritzed on some dark blue.  I love the blend of the two inks.  I spritzed water to tone the ink and to mix them further


I also added a little of the silver mica spritzer, just a little for a bit of shine


I then dried it all with my heat gun.  Look how the colours change.  I love seeing the effects you achieve once the inks are dry, they often form veins of colour which are really interesting


I decided to knock the colour back a little, to swept over some white gesso.  Literally take you paint brush, load on your gesso, and sweep.  Don't apply to much pressure at first, build up the gesso until you are happy with the effect


The base you pop your art piece on will change how it looks, you can see how the colours stand out when I pop it on a white base


You may want to add extra embellishments - remember you can still colour tint them so they will match.  Just lay them on and see if you like the composition


I didn't like the flowers!  I turned to my trusty magazine instead, and cut out the word Escape.  I played around a little to decide where it looked good


And then decided to anchor the frame down with a ribbon - which I decided to run around the back of the piece.


Matt and layer your piece.  This is the same as you would mount your artwork - I went with a white mount, a small piece of black card and then finally a piece of white mount board


I adore the textures, and how, once it's completed, you can not tell what anything really is!  Who knew it was a bit of scrap card and some glue.


I finished, and then decided to add some gilding wax - well, it is....Monday?  


I hope that is helpful to those people who were stuck on how to start an altered art piece.  It's so rewarding - I'm completely obsessed.  Hopefully tomorrow I'll be able to attack the challenge, otherwise it's another altered art piece :)

Wednesday, 3 February 2016

14 days left of house arrest remaining :)

Good evening crafters.

There are days when the craft room just doesn't inspire.  Today was one of those days.  We all get moments when our mind are in too many different places and, well, busy.  So. damn. busy.  The thought of "having" to make something seems impossible.  It's days like those,when doing this challenge can be quite a drag.  I wanted to share this, as I'm sure, as a person who now makes a living from my craft, it would seem I'm always bursting with idea's and creativity.  Does forcing yourself to just get on with it help?

We hear, and talk, of mindfulness, and the calming effect of creating, but sometimes that seems like an impossibility, just the thought of sitting down to craft can be overwhelming.  Attempting to build up the enthusiasm to start a project, when you feel despondent.  Where do you start.

This evening I trotted off to my craft room, with this mood looming.  Yesterday, I had started a project which I completely fell out with - the colours were wrong, and it just looked awful, but for once I didn't just pop it in the bin.  Instead, late on in the evening,  I covered it in gesso - well, that's what I intended to do.  What I actually did (whilst brushing my teeth - ever the multi tasker!), was cover it in a glassy gel.  Not to worry.  I walked away and left it to dry. This morning (again, brushing my teeth!!), I did cover it in gesso, and allowed it to dry.  So, this is where this evenings crafty journey began:

From this:


To the white out:


This was perfect for the mood I was in.  A strange blank canvas.  I wasn't sure what to do with it, but figured I couldn't actually make it any worse - with this in mind, I knew I could experiment freely.  So, I sprayed some bold green


And then a stunning strong blue


And added a red.  I then sprayed a silver shimmer over the top to spread the colours and blend them out a little


These are the spritzers I have used for this project.  They are all Mica based spritzers, so will dry with a sheen


There was ink left on my mat, which I used to colour the little butterfly which I'd actually ripped off the project. I popped this aside to dry


I blasted the card to dry the first layer of ink.  I wanted to build up the depth of colour, so spritzed again, this time I didn't water the ink down with the silver.


I started to dry the ink.  I loved the colours.  They changed when the heat was applied.  I presumed this was a reaction with the gel and the gesso.  


I love it.  The gel has added texture, but also brought all the layers of paper, dies and ribbon together


I did decide the sheen was to much, so added a little black paint.  I did this very subtly indeed.  I picked a little paint on a sponge, which I literally dusted over the piece.  This enhances the textures, and creates extra depth


To finish my piece, I added white and black mat and layers.  


I decided to cut up a lovely magazine, to find the perfect sentiment, and also added my little butterfly back in place 


I didn't want the words bright white, so toned them down with a little ink. You can see the difference here, with the craft being a shade whiter than the magic


I'm really happy with this.  "A restless mind creates curious craft magic".  But, the question remains, does crafting lead to mindfulness, or help with the ability to calm our minds. For me, it worked.  I lost myself in my creativity, and loved it.  The process engrossed my mind, focusing my wayward thoughts, and allowed me to chill out and calm.  And I was so happy with the result - so not only a calmer state of mind, but a sense of achievment.  Now, what shall I start whilst brushing my teeth this evening :)


Monday, 1 February 2016

16 days remaining - The Shaving Foam is out

Good evening crafters.  Sorry for the late post.  I did promise a couple of makes today - but I'm afraid I've still been quite snuffly, so only managed to have a little experiment this evening.

Crafting offers us an abundance of possibilities, and I love revisiting old techniques.  The shaving foam technique is one of those I tried many moons ago - but we have different inks, paints and powders to experiment with, so there's always the possibility of a new discovery.

Because I'm obviously feeling sorry for myself, the craft comes downstairs.  Lethal.  Stupid.  But I do it anyway - and watched a great program on Madagascar.

Set up a tub to put the shaving foam in, allow enough room to spread the shaving foam and then lay the card in - you don't want to be faffing about in a small container.  Cheap shaving foam does the job.  I think this was 40p, and it still smells lovely (probably!! Snuffle snuffle :) ).  Get lots of card ready, it's a great way of using loads of scraps and making them into something lovely.


Pop your shaving foam into the tray


And spread out a little


The first thing I want to show you are spritzers.  There are soooo many available these days.  There will be the pure ink spritzers, or those with a mica content.  Mix and match them, they all work wonderfully


Spritz


Either take a print straight away, or use a paintbrush to mix the inks


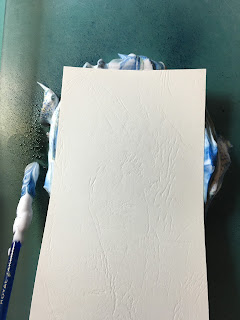
To take a print, pop your card into the shaving foam.  Press the card down so the ink will be able to soak into the card


When you lift the card, it will still have loads of shaving foam coating it


Remove the excess foam, I used a spatula knife, and pop the foam back into the container as you will be able to use it again.  Look at the amazing print!


Give the foam another swirl, and take another print.


Second print, still very cool indeed.  It almost looks like material doesn't it.


Try adding another colour to the mix, and take another print


The way you move the ink and foam will effect the print, so here you can see if swirled it into a circle


Next, paint.  Acrylic paint is great for this technique.  I used different makes of paint, but they all worked well together


Initially I watered the paints down with water and added them to the foam.  Swirl again, as before


You can see how strong and vibrant the colours come through on the first print


The second print is more subtle, but equally effective


I then added the paint direct to the foam to see what happened


Perfect


Next, mica powders.  Once we had to add a bonding agent to our mica powders, but these days all that's required is a liquid, as the bonding agent is already mixed in with the powder


I dusted the mica powders onto the foam.  I spritzed it with water, and then took a print without swirling the foam


The print is quite patchy, but I quite like it


Now, if you mix the mica into the foam, it just disappears


Next, alcohol inks.  I love the way these start eating into the foam, but the colours stay really vibrant. 


Look how bold the print is


I've used the palette knife to smooth the foam this time, to see how this will look


I got a very gentle print from this one.  The colours don't stay as vivid as they do when I was using the acrylic and spritzers


Add a couple more drops of colour


And another vivid and beautiful print can be easily created


Okay, try this.  I've spread the ink in the foam, and then layed a mask gently on the foam


Lay the card onto the mask, press down gently.  Lift the card off as usual, and just allow the ink to sink into the card


When you remove the excess foam, you will have the mask print, with that cool marbled effect


I popped the mask back on, and then spritzed over the top.  I actually did two prints, the first one, as above (which I have forgot to photograph!!  Sorry)


For the second one, I removed the mask, and then took a print of the remaining ink


Pretty cool!


Okay, that's enough of that.  Now the really boring bit of cleaning up.  Urgh.  

Hopefully tomorrow I'll use one of these in a finished piece - the others will be sent out to the winner of todays work when the Crafty Countdown draws to an end :)