Showing posts with label Staz on. Show all posts

Sunday, 24 January 2016

24 days _ Crafty Countdown. Playing with Egg shells.

Honestly, playing with egg shells.  This is what I love about the challenge.  It makes me use something I would never have imagined adding to my crafty stash.  And I have absolutely loved this technique.  You have to try this.  So easy.  So effective.  It started with scrambled eggs, and then the shells were left to soak overnight.  This is interesting, the plastic cup I soaked them in disintegrated! You can see from the photo how it has essentially cut the plastic in a perfect line!  It's okay, the egg shells were fine.


I cleaned the solution from the egg shells, and peeled off the membrane inside the shells.  I then decided to use the tissue part of the challenge.  I also decided to use this GlazOn from StazOn.  I've never used this before, so thought it was a good time to experiment


I applied a layer of glaz to a piece of acetate


And then sprinkled mica flakes


and gold leaf


I then ripped and scrunched pieces of tissue paper which I stuck into the Glaz.  I added Glaz on top of the paper where necessary, to make sure it's completely stuck down


Now, leave this to one side to dry


I decided to use a MDF frame for my egg shells


I used acrylic adhesive, this is one from Debbi Moore.  I just did a little at a time, as the glue is strong, and quite quick drying.


Take your egg shell and lay it into the glue.  Then squash it down onto the frame


It cracks, and basically gives you an instant mosaic!  How cool is that.  I used a cocktail stick to move it round and spread the shell out where required
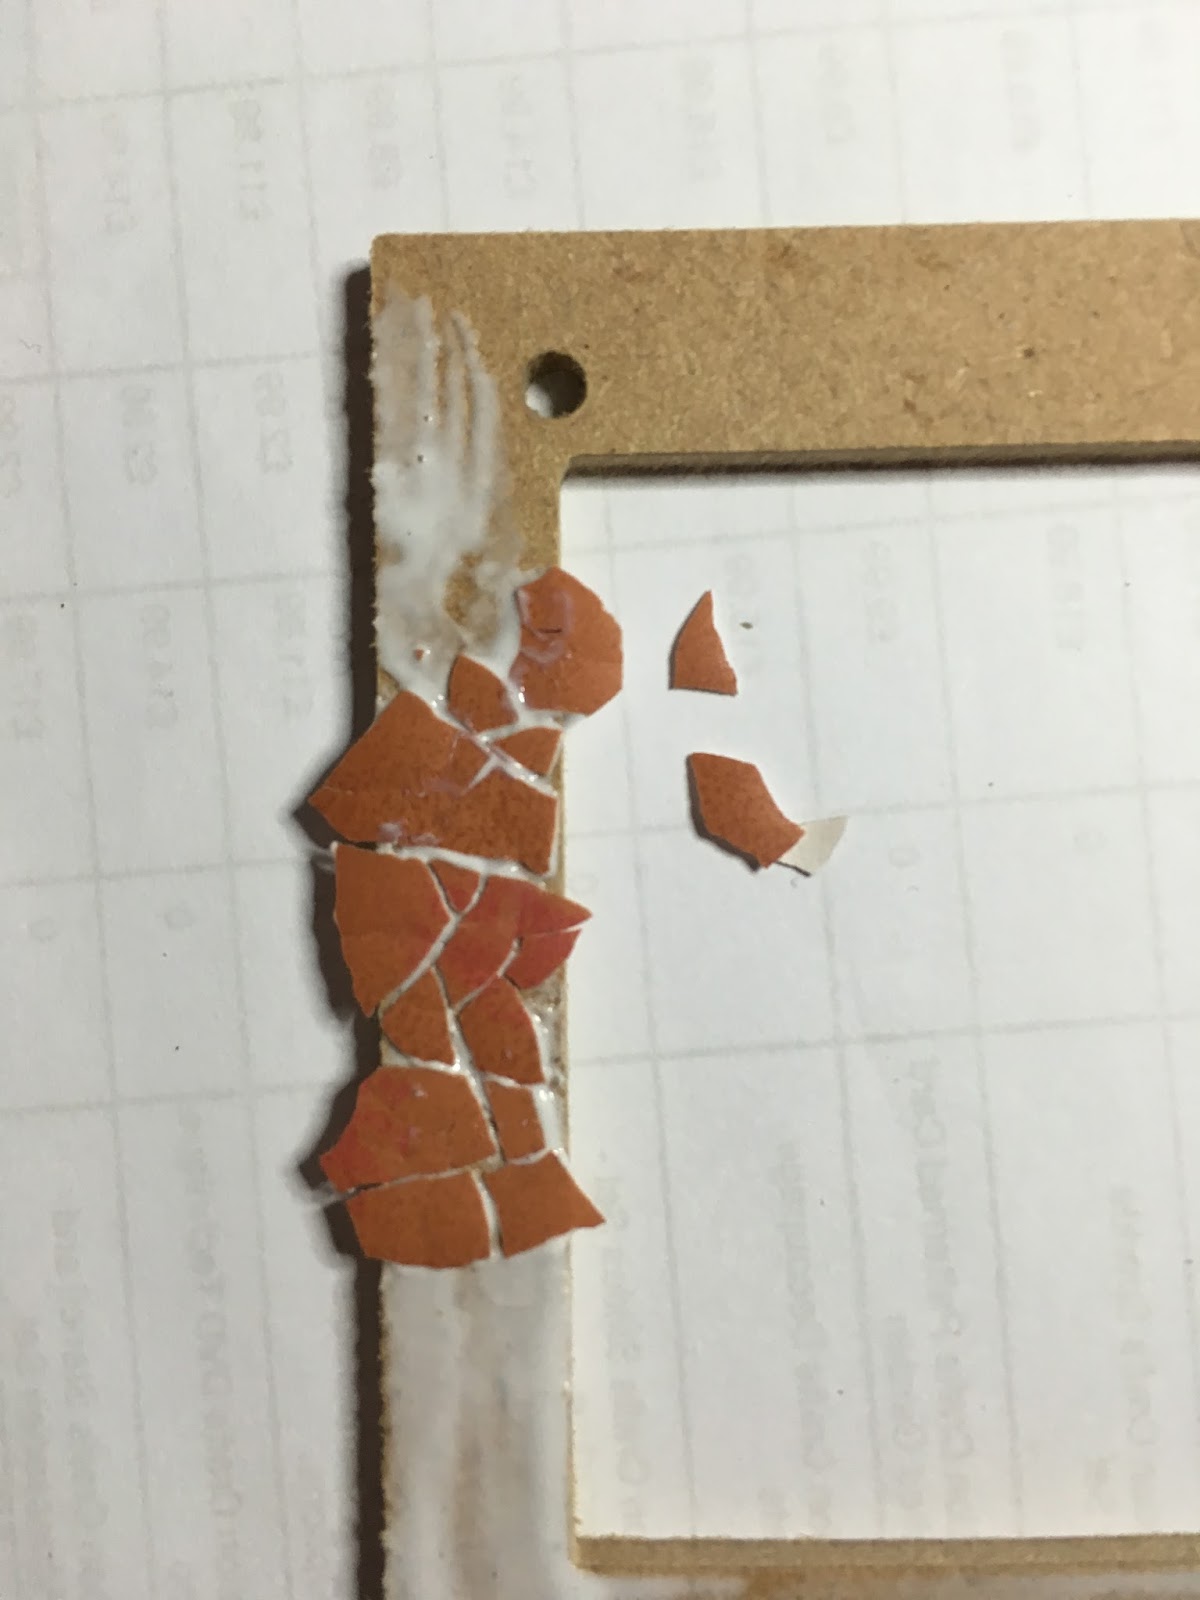


It comes together really quickly.  Don't worry about the glue being to thick, just try not to let it spill all over the shell


Even before it's painted I think it looks good


I had a look at the colours on the acetate sheet, to help me decide what colours I needed to use for my frame


I decided for warm reds and brown tones.  I then added my alcohol inks.  I haven't use these in such a long time.  I love the way they move and spread


I used a nice red, butterscotch, and a brown.


I must admit, the colours arn't captured in the photo.  They are very effective


I checked the background again, to make sure it looked okay.  At this stage I was still unsure whether to use my background on the smooth shiny side, or the textured rough side


Next I took a little wood heart


If I add alcohol ink directly to it, because it's so porous, the ink just sinks into the heart.  Apply a sealant to allow the alcohol ink to move and blend.  I used Mod Podge.


The last item in the challenge, was rub ons.  These are an old product, and Sheila was right, I've got some!  The are still really creamy and worked beautifully.  They are very similar in application and the results, to gilding wax


This is the frame before


And this is after the Rub Ons.  You can see the sheen.  You can see from this photo, I have also decided to go with the textured side of my acetate, and backed my frame onto black card


Now I started to layer.  I popped a die cut


Then string


Some more foliage die cuts


And then I found a lovely button.  Of course it needs alcohol ink.


I added this to the corner with Pinflair glue gel


I also added my wooded heart, and a little piece of lace 


I dug out a spiral, and stampled the word love.  I edged the card with the rub ons, and glued in place


And then changed my mind - and moved it.  I also stamped Life, which I added on.  I then decided to add Glossy Accents to my frame, heart and sentiments.


I added wire to the top of the frame, so it can be hung.  And a few wire coils inside the frame.


Egg shell mosaic.  Who knew it could be this cool!!  Thank you for the challenge Shelia, if you send your address to me I'll get this in the post for you.  My email address is leoniepujol@hotmail.co.uk


Wednesday, 8 December 2010

Craftaganza Weekend

As promised here are the cards I made for the fantastic weekend I spent with the Crafters Companion team and the brilliant crafters. We had such a good time, and I got loose with glitter (poor poor hotel!!).


The first project I prepared was a tag, which could be used as a topper for a card of course. This was easily made. First the base was created using Spellbinders Labels 12 dies, cut the largest then the next one down, then cut a frame using both of these dies. I used the wonderful watercolour card to cut out my frames, and used the embossing mat to make an embossed border.

Now, ink, my favourite! I used Distress Ink Rusty Hinge and Wild Honey. I stamped using the beautiful stamps designed by the very clever Jayne Nestorenko, the Cute Companions Christmas Delights range (if you haven't tried these yet, get them, they are really delightful). The image I used was the rabbit reading a Christmas wish list. Simply stamp in the darker Distress ink, and using a damp paint brush gently blend some of the ink from the image. This gives your picture tone and you can even create a base. If you need more ink, simply dab your Distress ink pad on a mat or plastic bag and pick a little ink up with your paint brush - mix the ink with water to dilute the colour. Using the Rusty Hinge stamp the Yuletide Greetings word to your tag.

Using a cut and dry sponge, pick up the Distress Ink Wild Honey from the pad and start to blend the ink round the edges of the stamped card. Add a little of the darker Rusty Hinge round the edges.

The largest label can be coloured using the rusty hinge colour, when covered I used a splash of water to give a little texture. I only added a small touch of colour to the frame, as you want to keep some white to allow it to lift the top label from the bottom, and not blend into the layers. I wrapped a piece of ribbon around the frame and then glued the frame to the largest label, I then stuck the smallest label on the front with 3D foam. I tied a piece of cinnamon stick to the top of the label.

To finish the tag I mixed some ground cinnamon with fine cut glitter. I added a larger proportion cinnamon to glitter - until I was happy with the fragrance and colour. Using a quickie glue pen I applied glue to the embossed edge of my labels, and covered with your wonderful smelling festive glitter.

Why not try adding cinnamon to embossing powders, I haven't tried it yet, but it's on the "to do" list!!


Next is the snowy Love card. The base of this card was made using the letters from the Adorables CD (fantastic for the paper selection as well!). I printed the capital L as large as I could, twice, and then the rest of the letters the next size down, just once. Print them off and cut them out.

Go round each letter with a white gel pen. Now stamp using a black staz-on the cute figures, again from the Cute Companions Christmas Delight sets. I used the snowman, mouse with her little toy, broom and quite a few snowballs. Colour the images in using you preferred medium - I used watercolour pencils for this card.

Now it is simply a case of putting the card together. The letters actually form the card, so first you need to stick the two L's together. Put them one on top of the other, the back one you need to score and fold, then attach them using double sided tape. The L's will now open like a L shaped card. Now build the rest of the letters and figures to the top L. Design the card first so you know where you want to put your characters, you can have them over lapping, interlinking, some flat and some attached with 3D foam. It is important all the letters are straight, so the card will stand up. It is also important all characters overlap to keep the card together. This will form the front of your card.

The back of the card, so give stability, I have used a little torn card to resemble a snowy hill, attach this behind the back of the second L. You can add more "snow", if you feel the card needs an extra layer.

Try using this method to create personal cards with someones name, or a message. You can have your figures dotted all over the card, and using the CD's means you can alter the colour and pattern to make it different every time.

A touch of glitter glue adds a lovely finishing sparkle.