EEEkkk, here comes the blue sky!! Peaking from around the cloud, the sky is clearing, ready for the weekend and our trip up to the top of the Island to Cape Reinga. Looking forward to our first mini road trip! Loads to see. I'm then gonna drag Jenny round all the art shops we passed today in Kerikeri.
It's sunny folks, hooray for sun in December! I could live with this kinda Christmas.

Thursday, 6 December 2012
Wednesday, 5 December 2012
New zealand
I made it!! Didn't get lost, didn't miss any planes. All very stress free actually. Okay, it would have been rather lovely not to be in economy on the 27 hour flight! Talk about sardines. They do cram us in dont they, but it was good food, and I managed to sleep, and we landed early on both flights. My favourite flight was the tiny plane from Auckland to kerikeri. That was brilliant.
I was amazed at the peace and tranquility of the place where Jenny lives. It's beautiful. They are surrounded by little harbours and beaches, and it is so green and lush. Jenny lives in a tiny place called Russell, which many moons ago used to be quite rough - years ago of course. Now it has quaint shops, nice cafes and a brilliant chocolate shop (obviously had to go there pretty soon on arrival!).
We're planning to go and see where the hobbit was filmed (us little uns will fit in rather well there). And have a day in Auckland as well. Otherwise, lots of chatting, a little booze, and hide and colouring in with Juliette!
I hope my codes working on the web site, so anyone wanting to treat yourself and save some cash will be able to get 10% off their order - which I will be sorting upon my return.
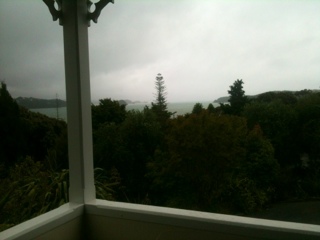
Photos are the view from Jenny's house, Jen and me - and a bug!


I was amazed at the peace and tranquility of the place where Jenny lives. It's beautiful. They are surrounded by little harbours and beaches, and it is so green and lush. Jenny lives in a tiny place called Russell, which many moons ago used to be quite rough - years ago of course. Now it has quaint shops, nice cafes and a brilliant chocolate shop (obviously had to go there pretty soon on arrival!).
We're planning to go and see where the hobbit was filmed (us little uns will fit in rather well there). And have a day in Auckland as well. Otherwise, lots of chatting, a little booze, and hide and colouring in with Juliette!
I hope my codes working on the web site, so anyone wanting to treat yourself and save some cash will be able to get 10% off their order - which I will be sorting upon my return.
Photos are the view from Jenny's house, Jen and me - and a bug!
Sunday, 2 December 2012
First leg of the journey!!
Well, I've found the car park, managed to get through security, and even got to my boarding gate without having to have that awful announcement that names and shames you as the last person to board!! New Zealand here I come! Very excited indeed.
On the drive down I stopped at some services and saw 6 ladies sat in Starbucks knitting! I was tempted to get their photo - they looked ace.
Right, lets see if I'm sat next to anyone or if I can stretch out, fingers crossed xx
On the drive down I stopped at some services and saw 6 ladies sat in Starbucks knitting! I was tempted to get their photo - they looked ace.
Right, lets see if I'm sat next to anyone or if I can stretch out, fingers crossed xx
Saturday, 1 December 2012
Paint and a parcel
Back to parcels, this time make your own decorative parcels - easy and fun.
I used my EK Success circle punch and punched through a piece of card. I then used three different shades of Eco Paint and sponged through my circle. Viola, your very own mask!! How easy is that. Cut your paper to size first, apply the ink with a cheap sponge, and don't add to much paint. You are working with cheap paper, so you do't want to soak the paper. I used orange and reds, which looked great when you add a silk crush orange ribbon. You can use any colours, get them to match your colour scheme.
I did also create a wonderful mask using my lovely Martha Stewart snowflake punches and sprayed repositionable adhesive through the mask. I just did a couple at a time, and then added my smelly powder! This is created using a tub of ground cinnamon mixed with gold glitter. It works perfectly with the brown paper, and of course smells great! I love this technique. Imagine the different smelly powders you could create. One lady came over to me and told me her Dad loves curry, so she was going to make a curry glitter powder! Amazing. You could of course, use this with talc for baby pressies etc. Unfortunately I can not share a picture of this one, as it got picked up (or put somewhere safe) after my last demo. Sickner, as it was my favourite. I finished my smelly parcel with a lovely scented ribbon. This is so easy. Use the cream vintage ribbon and add drops of room scrent. Rub this into the ribbon for a fabulous scent. I used one I picked up from Sainsburys, it was one of the scents that generally comes with the reeds. On it's own it was rather over powering, but a little on the ribbon was great.
Let me know how you get on with your smelly pressies!!
 I used my EK Success punch for the tags, and then dried my own oranges. This is easy. Cut your oranges into thin slices, and try to remove as much juice as possible. You can put them in the oven, but as I'm rather tight, I liked to dry them on the radiators, on top of my gas fire, and in the airing cupboard. If I had the oven on however, a few would be popped in on the bottom shelf!
The small cone (unfortunately you can't see this very well from the photo), was attached to the parcel using Cosmic Shimmer clear drying glue!
I used my EK Success circle punch and punched through a piece of card. I then used three different shades of Eco Paint and sponged through my circle. Viola, your very own mask!! How easy is that. Cut your paper to size first, apply the ink with a cheap sponge, and don't add to much paint. You are working with cheap paper, so you do't want to soak the paper. I used orange and reds, which looked great when you add a silk crush orange ribbon. You can use any colours, get them to match your colour scheme.
I did also create a wonderful mask using my lovely Martha Stewart snowflake punches and sprayed repositionable adhesive through the mask. I just did a couple at a time, and then added my smelly powder! This is created using a tub of ground cinnamon mixed with gold glitter. It works perfectly with the brown paper, and of course smells great! I love this technique. Imagine the different smelly powders you could create. One lady came over to me and told me her Dad loves curry, so she was going to make a curry glitter powder! Amazing. You could of course, use this with talc for baby pressies etc. Unfortunately I can not share a picture of this one, as it got picked up (or put somewhere safe) after my last demo. Sickner, as it was my favourite. I finished my smelly parcel with a lovely scented ribbon. This is so easy. Use the cream vintage ribbon and add drops of room scrent. Rub this into the ribbon for a fabulous scent. I used one I picked up from Sainsburys, it was one of the scents that generally comes with the reeds. On it's own it was rather over powering, but a little on the ribbon was great.
Let me know how you get on with your smelly pressies!!


The small cone (unfortunately you can't see this very well from the photo), was attached to the parcel using Cosmic Shimmer clear drying glue!
Friday, 30 November 2012
The perfect parcel
For the Ideal Home Christmas show, I did cards and gift wrapping. I thought I would tell you how I created pretty, yet cost effective parcel wrap.
The first parcel is so very easy. I cut my brown paper to size, just cut it slightly longer to cover yourself in case your punching goes a little wrong! Better safe than sorry. As the brown paper is cheap paper, your punch will just chew the paper if you cut through it singly. Make sure the edges of your paper are straight and lined up so you can punch through both two pieces of paper at the same time. I used my lovely Anna Griffin deep edger punch. Wrap your pressie, tucking one of your punched sides inside (handy if you have made any mistakes!). Use double sided tape to glue down the edges.
Add ribbon to really make this parcel look incredible. One piece of silk crush ribbon looks amazing, but before you tie your bow sit a piece of red crinkle edge ribbon on the knot of the silk ribbon. Now tie a bow in your silk crush ribbon, and this will hold your red ribbon in place and really give it the wow factor. You can use so many ribbons in this way. Combine cheap ribbon or string for the main wrapping, and then trap expensive and stunning ribbons to complete the look.
I finished with two pieces of cinnamon which I held together with lovely red burlap, passed under the centre of the bow and tied in a knot, this will hold it in place and look wonderful.
A little Cosmic Shimmer gold pva to the edges of my punched border finishes your perfect parcel.


Embossed Baubles

First we created our background card using distress stains. I used blue and white, which gave a lovely winter feel. Using the same distress stain blue, ink your snowflake stamp and stamp randomly over the card. Allow the snowflakes to 'fall off' the card, this will give you a background look. If you try and keep your snowflakes within the confines of the card, it will look contrived and planned without the natural flow.
Now emboss the beautiful Very Xmas Light embossing folder in the centre of the card. You can see where you are going to emboss, so make sure it is in the right place, don't emboss it to close to the bottom or the top, or it won't look even. Your card will need to be the size of your folder to avoid lines from the edges of the folder. Now to emphasis the embossed bauble, use a light silver or white gleam over the image. It is subtle and very pretty.
Using a fine glue pen (either a quickie glue pen or a sakura glue pen) add glue to each of the embossed areas. Cover with silver embossing powder, this will stick to the glue only. Don't worry if you haven't managed to glue all the embossed parts, you can see what you have missed and add more glue. Cover the parts you missed with silver embossing powder. Now heat emboss the powder. It will really make your image pop out!
Stamp the message on a piece of scrap white card, and emboss with silver embossing powder. Cut out the image.
Mat and layer a piece of silver mirri card on the back of the embossed card. Cut a piece of white card substantially larger than your main image, and a silver piece of card bigger again. Attach all the layers together.
You want to create two side pieces which will allow your card to stand! I had a piece of card just 2cm larger than the largest layer. Cut this piece of white card in half, and emboss a 1cm border on the side of the two pieces of card. On the other two edges, stamp your snowflakes. Stamp twice with one ink application to get a variation of colour. Attach the borders to the back of the card, so when you open it up from the back you can see the stamped panels.
To finish your card, attach a piece of white crinkle edge ribbon at the top of the bauble, and a little stickles glitter glue.

Wednesday, 28 November 2012
Snowflake card
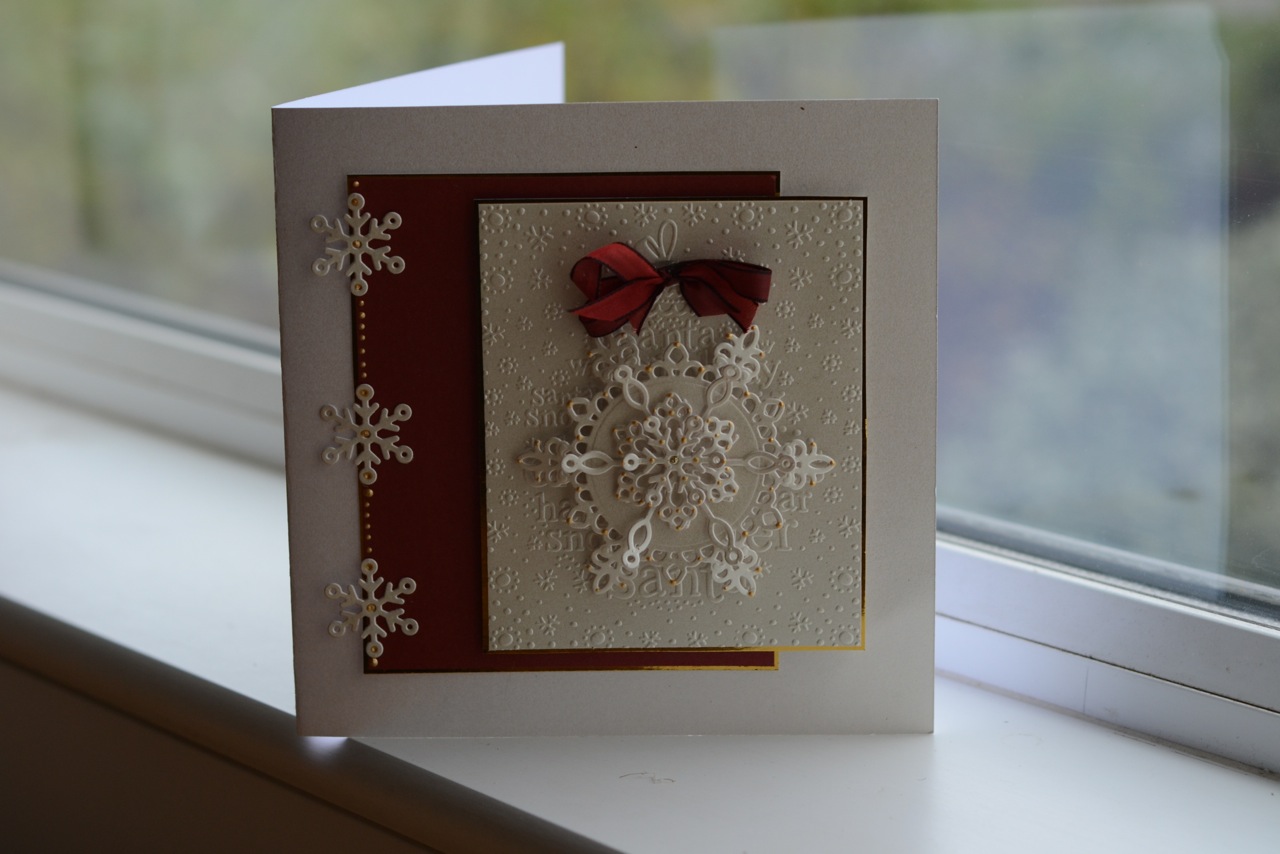
Cut out each snowflake using ivory pearlescent card. Cut out three extra small snowflakes.
Next, using the ivory pearl card, emboss the card using the Message in a Tree, embossing folder from Courture Creations. Very pretty indeed, and looks amazing on pearl card.
Make a 8"x8" card again using cream pearl card.
Mat and layer a piece of gold mirri card behind the embossed card, then cut a piece of red card slightly larger again.
Attach the red card to the left of the square card. Mat and layer the embossed card so it falls slightly off the red card - I used 3D foam to give it a little lift.
Now attach the snowflakes. You can shape them so it adds dimension to the card. Attach the snowflakes to the card using Pinflair, then attach the smaller snowflakes to the left again using pinflair.
I then added a lovely red ribbon to the top of the bauble using pinflair glue
A tiny amount of stickles glitter glue finishes the card.


Christmas Frame
Finally, I'm grabbing some time to copy up the instructions of the projects we did when I visited Faversham. It's taken a while, but here we go!

This is the frame we created, sorry the photo isn't clear, I have a few close ups to share with you.
First we decorated the frame with distress stains. These give a lovely natural look to the frame and stain the wood whilst still allowing the wood grain to show through. Make sure you cover the whole frame, even the inside.
Stain the canvas as well, using the distress stain. Use the picket fence stain to add a touch of white to the frame to give it a shabby chic look.
Stamp a background stamp on the canvas, I used a full xmas words background stamp. Use a die ink pad, like archival. Allow the stamp to start and finish off the page, if you will. This makes it look like a background as opposed to being to planned and regimented.
Stamp your Santa, using Staz on black, onto acetate (make sure the acetate is big enough to cover the canvas, and stamp with plenty of room around the image, not in a corner), and then stamp again onto plain cream card. Lightly colour your Santa on the card, using white for the white bits, and pink for the skin. Glue the santa card to the canvas, then overlay the acetate on the top.
Stick the acetate to the edge of the canvas so you can't see the glue, as you will be sticking the canvas to the back of the frame (not the inside where you generally attach it). Allow the acetate to dry before sticking to the frame. The acetate enriches the image, making it stronger and more prominent. I use Cosmic Shimmer glue for the acetate and to attach it to the frame.
Now using grunge paper, paint the front and back of the paper with eco paints. I used a mix of greens to create different tones. Apply the eco paints with a cheap sponge, you will be able to get a good coverage without using too much paint.
Using a fine drawing pen, draw some holly leaves. I didn't attempt to get them perfect, or all the same. It looks brilliant if you have them 'quirky'. Cut out the holly leaves, then heat each one. As it's grunge paper you will be able to shape them when they are warm. I added extra detail with the drawing pen, just a little stitch design around the edges.
When I was happy with my leaves I worked out where I wanted to place them before gluing them all down with Pinflair.
Using Eco Varnish, I varnished all the leaves to give them a lovely shine.
Add a lovely big ribbon, I used the crinkle edge red ribbon, which is really effective. Add some of the pearl pins to the frame as well. I used Pinflair glue to add the embellishments.
To give a real shabby chic look, use a little glue on the frame, not to much (I use the crafty notions glue or a glue pen). Allow it to dry a little, then add some of the metal flakes. Again, you don't want to add too much, this is just to give it a little shine and colour.
To finish your frame, using either liquid pearls or Cosmic Shimmer PVA in the centre of your leaves, this will dry solid and look like holly berries. Voila, a happy Christmas.


Tuesday, 13 November 2012
Ideal Home Christmas Exhibition
OMG....I am nervous but very excited. It's Christmas at Earls Court, and we are going to be celebrating by using very cheap and cheerful brown paper to wrap our gifts and make our cards!! I will be there tomorrow until Saturday (I was on the list until Sunday, but it has been changed....a day off!! Hooray). I would love it if you could come along and say hello:
http://www.idealhomeshowchristmas.co.uk/christmas-craft-theatre
I've taken photo's, but they're rubbish! I'll try and get better ones tomorrow.


 And the last one is actually done with glitter and cinnamon so it smells yummy.


Monday, 12 November 2012
Oooops,....
This evenings plan was to get the photo's up of the cards we did at the workshop in Faversham, but I've put them somewhere safe!! I think I know where they are - in Adams car. That doesn't help me pop them on here unfortunately. so, I do apologise to the lovely ladies who I promised to put full instructions on....I will do it as soon as I find my samples. In the meantime I thought I would share a photo or two from the NEC. We had a marvellous time, thank you to everyone who visited us. It was brilliant. Everyone is so lovely, it really does make our job so special. And of course it was Nigel's birthday, so we did have a little celebration as well.....and we weren't to rough the day after either!!


Tuesday, 6 November 2012
Death by Quorn......well could have been!!
Sounds a little dramatic doesn't it! I know, but the bloody thing could have killed me, I tell you. Last night I had invited some friends over for fireworks and chilli, and treated myself to a little quorn sausage butty before getting ready. I am allergic, but after the doc told me to take antihistamine for 2 weeks to break the reaction to mossy bites, I figured it would also stop my reaction to quorn. Which it did for a while.
Butty scoffed, off I went to walk the dogs. 10 mins into the walk I had a sneezing fit and realised things weren't good! I rushed home, eyes slitty, and nose feeling like I'd shuffled a bag of marshmallows up it! Thankfully I got to my pills before my throat started closing off as well. Scary how quick it happens.
Imagine the end being due to a quorn sausage. Gotta admit, lots if comedy value in it. However, lesson learnt, quorn is off the menu again...forever. Hopefully the swellings will have gone down for the NEC!
Thursday, 1 November 2012
Prepping for the weekend....
the weekend, Faversham. Really looking forward to my visit to Kent. The drive always gives me a pang of sadness, as I do miss living in Canterbury so much. I'm going to set off nice and early, so hopefully be organised for the first class at 10am. I have had a bauble obsession, not sure what that's about, but two bauble cards! Different of course. I have lots of snowflakes to cut out as we speak! I'll break my normal rules, and actually pop a photo of one of the projects we are going to do. If you haven't booked a space yet then do give them a bell, as I know there are spaces for the morning workshop;
http://www.theartisticstamper.com/workshops

http://www.theartisticstamper.com/workshops

Happy Halloween
Well, the rain kept all trick and treaters away from our door, we had the lanterns out, and loads of sweets, but it was spookily quiet. How very dull! It is absolutely chucking it down though, so I don't blame them I suppose.
However, we still did a little haunting of our own!! Obviously :)


However, we still did a little haunting of our own!! Obviously :)


Sunday, 28 October 2012
Dabble day....
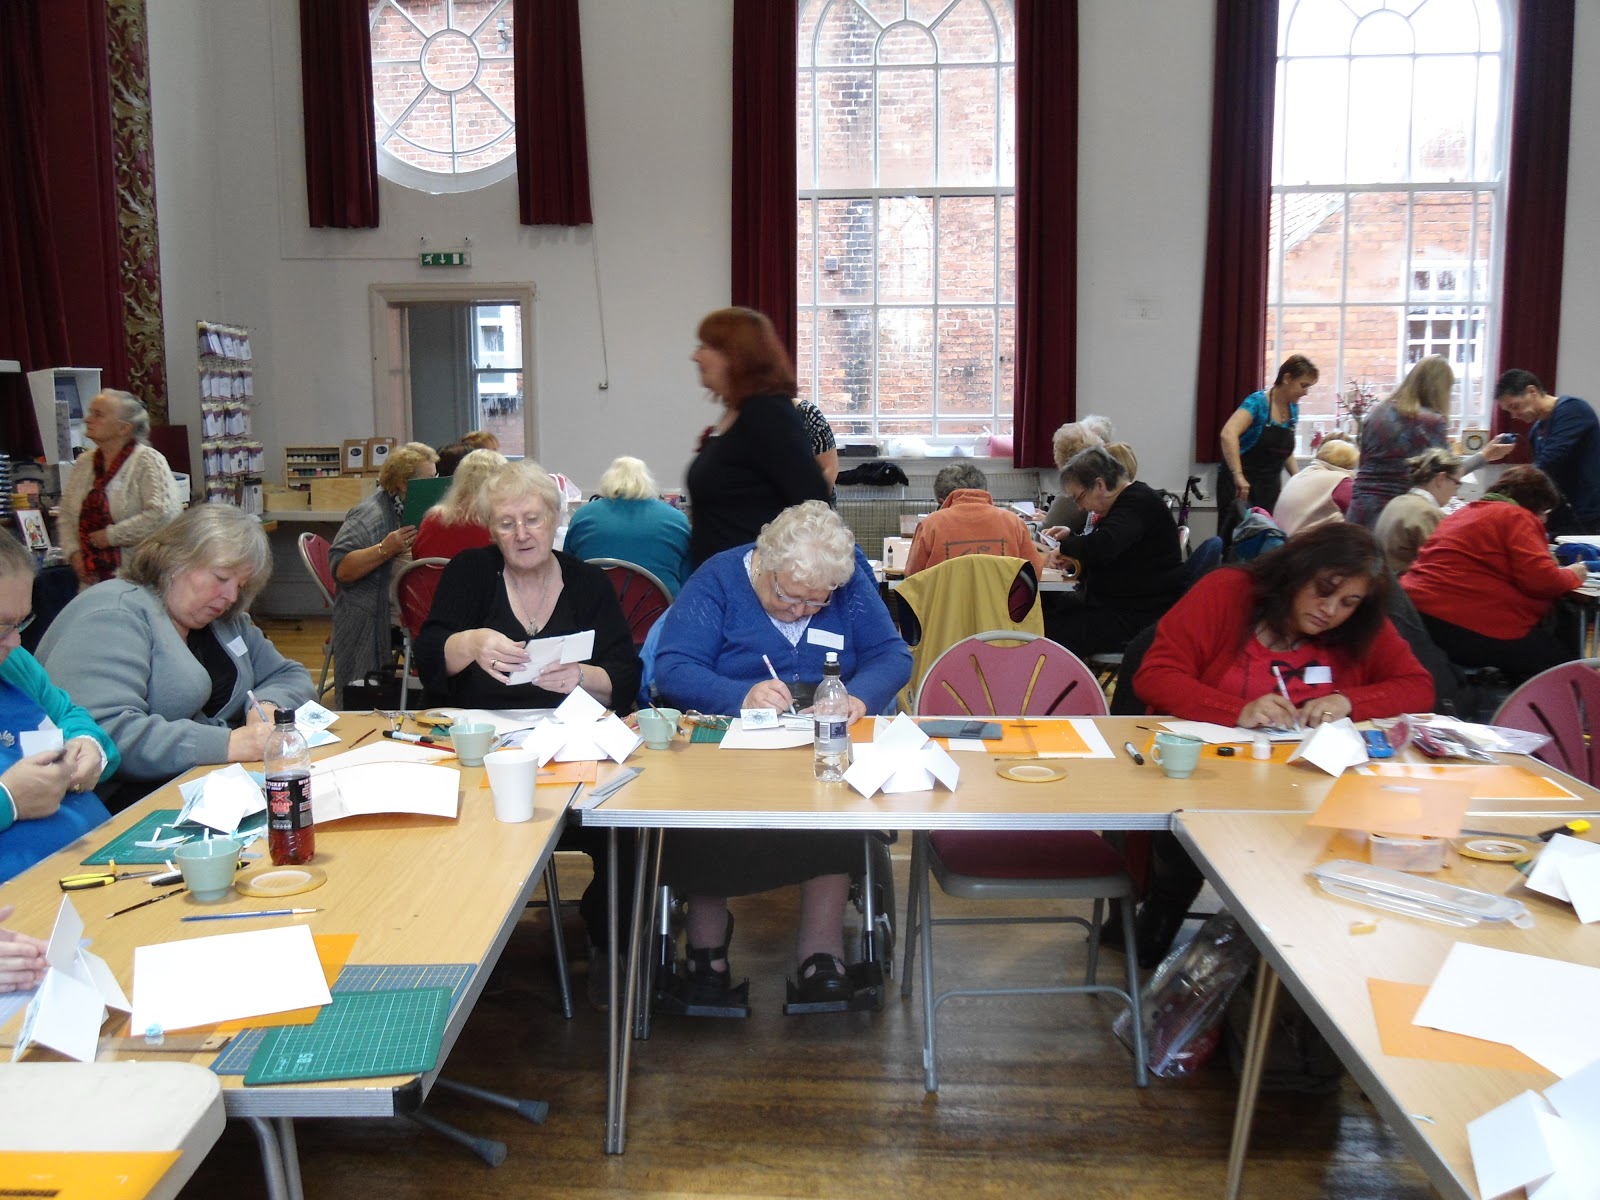
Wow, what a day. Marvellous. If you have the opportunity to go to the next one, get yourself booked on, they are organised by Kim Sutton, and I can honestly say it ran so smoothly and professionally it was a joy to attend.
First I need to say thank you to Kim and her team. The demonstators were looked after so well, we had constant drinks supplied (which trust me, a lot of organisers don't bother to do - even though you are talking constantly), they made sure we were fed at half time (again, a lot of organisers don't care if you are running on empty), and even offered breakfast, as I actually got there on time!! When you are looked after properly it really makes you feel as though your work is actually valued, so thank you so much Kim and Co if you are reading.
Secondly, well done on the organisation. Kim has been running these for many a moon, and she has managed to get it perfect. There were 6 demonstrators, and each of us had a table of approx 14 people. We taught for 45mins, then our tables moved round. We repeated our card, which meant everyone got to make 6 different projects. It was fun, didn't feel manic, busy without being hectic. Obviously the people were great, of course....crafters unite!! It was lovely to meet many new people - and see some very familiar faces (I'll let the pictures speak for themselves....Helen and co!!).
I managed to remember to take a few pics, but not as many as I planned, as usual, but here's a few happy crafters:


Saturday, 27 October 2012
Faversham Workshop
Just for those who missed the details of the workshop I'm doing next week, the details can be found on the Artistic Stamper website:
http://www.theartisticstamper.com
The workshop is on the 4th November, and there is a morning session and an afternoon session. Tickets are still available - I think!! Give them a ring and they will be able to help you.
Now, better get prepping for it eh!!
http://www.theartisticstamper.com
The workshop is on the 4th November, and there is a morning session and an afternoon session. Tickets are still available - I think!! Give them a ring and they will be able to help you.
Now, better get prepping for it eh!!
Create and Craft and Tigerlilly
Had a fantastic show the other day. This is why I love C&C, we really do have such a good variety of shows. Lisa, who is Tigerlily, brought some absolutely beautiful felt kits. Now, this is something I have wanted to do for ages, obviously waiting for a spare min, but these kits make me REALLY want to have a go. My favourite was the Xmas stocking, I could just imagine these hanging on the side of the fireplace filled with lovely treats. And the price was incredible. If you missed them, then I wanted to share a few photo's with you:


Happy Crafting days
Had a lovely evening the other night....my friend Emily, wanted to do a little bit of crafting as she had a few cards to make, so Rachel, Emily and Catherine and myself got out the stuff and cracked on. It was really nice, and we have decided to really try and do this once a month. I love evenings like this, as obviously with crafting being a "job" sometimes you forget just how fun it is. I love showing everyone how to use stuff, and re-finding stuff as well! Obviously, me being me, I have already decided we can extend this to a craft group! I know, just leave it to a few friends popping round rather than making it another job. I do get carried away. Anyhow, here's the girls hard at work :)


Subscribe to:
Posts (Atom)