Thursday, 17 December 2015

Crafty countdown - some days left!

I can't remember what day I'm on, and I'm being lazy and can't be bothered checking!! Haha, sorry. 62? 61? Something like that! Anyway, who cares....what have I crafted.

Now, this technique I learnt whilst at create and craft when the lovely ladies who are Folk It came it - ahh will I miss saying that on live tv :)

I LOVE this technique. It's quick, simple but so effective. This makes stuff you could definitely sell!  Do love the ladies up, their lots are brilliant, and look pretty as well. The technique I have used is from the starter kit as well!

Okay, I started with a stamped image:

I quite like that. Just a stamped image in the middle of all that white card.

Move on Leonie!!

I sketched a heart around the stamp:

Now I added my paint, just blob out a couple of colours, and you will be using the back of your paintbrush! Pick up your yellow on the back of your paintbrush and pop a dot of paint onto your card 

Next repeat the dot but with the next colour, you are going to work around the yellow:

I was quite random with my flowers, but worked them around the heart 
The next flower is the rose. Again, dead easy. Pop a blob of white then a blob of red next to each other, don't scrimp on the paint, you want a decent blob :)
Put your paintbrush in the middle of the paint blobs and swirl the white into the red. Carry on the swirl working out. Don't worry if it doesn't work properly, just have a practice. It doesn't even matter if they're not perfect, as they still look good:

Sorry for the nail - I've been doing a lot of crafting again today.

Work around the heart, filling in where you feel


When you're happy it's time to add in the leaves - which are basically little hearts. And easy. Do two blobs of green next to each other, again with the end of your paintbrush. This time flick the blobs so the thinner end of your blobs meet:

Arnt they pretty! 

Fill the heart leaves around the heart, until you feel you have enough. To finish the painting, add just tiny blobs of white, this really does fill the space, and looks very effective 


To do something a little different I decided to use a drawing pen to draw over the pencil heart. In my mind this now looks as though my flowers are on a willow heart. I also needed to add some black, otherwise the stamped image looks to harsh. And, of course, a little glitter to finish. I need to leave it to dry before mounting onto a card, but I'm very happy with it :)




Wednesday, 16 December 2015

Crafty countdown - 62 days!!

Good evening. Wow, it's been a busy day again - and I'm retreating back to my craft desk as soon as I've posted this. Getting there though!!

So, with that in mind, it had to be another quickie - but this time I was inspired by some paints I used today. I've had these for years - in fact since I was working with Dawn at Topaz crafts! And they're still working perfectly. 


The mica colour paints give a fantastic shine, and you need such a small amount. They look really good on black card.

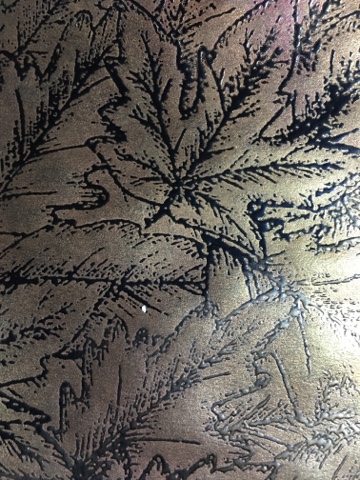
With that in mind I decided to stamp and emboss in clear embossing power, in order to do the "resist effect". I wanted a good big background stamp:


Ink the stamp with versamark ink pad. Put the stamp on your table, with the stamp side facing up, and then pop the card on top. I used a brayer to smooth the card Over the stamp and transfer the ink. I covered with clear embossing powder and then melted with a hear gun;

Now, paint. I added a little water to the paint and added it to the card. The colours are lush!


Paint directly over the embossing powder, but then use a damp cloth to wipe over the card to remove the excess paint sitting on top of the embossing powder:

You can see from the above photo the difference this makes. The bottom is the before, the top is after.

I finished this card very simply. I mat and layered, tied ribbon around the top layer before attaching it to my card. I then added a very old rub on, to finish.


Tuesday, 15 December 2015

The Craft Countdown continues with only 63 days to go!!

Tonight had to be a quicky, as I've lots of craft work to get on with.  I've got deadlines!!  By Friday I have to have my samples done which will be used for the packaging.  This is nerve wracking, as they have to be good.  And you know that feeling when every card you make looks rubbish - or it's just not right.  Or you splodge ink on it just as you've finished.  Yep, plenty of that has been happening today!!  So, the panic is on, which means my blog post has to be done speedily.  I hope you still like it.

I scanned my room, and saw these little beauties:

A pack of rather lovely die cuts.  A simple card was born!!

I cut my mat and layers, to frame my lady, after choosing my lady and her outfit:


I decided to emboss the dress to add a bit of texture, and then applied a little gilding wax, to add some sheen:

I am using a tall card, and used a stamp to add a few dots which will just about show behind the layers:


Now, can you see on the photo above, another blotch of random ink.  Aaargh, drives me nuts!!  I had to cover it up, which meant I had to add a sentiment.  I choose this, which I matted and cut at a jaunty angle:

I now simply stuck everything together, added a piece of ribbon and gem at the top, and then carefully added dots of Phill Martin Cosmic Shimmer PVA, and then pretty purple Stickles nestled in between: 

I popped this at the top of the boots, and on the hat.  Here's the finished card;


Now, for those of you who have got this far, I have the rest of the pack of die cuts, and a couple more packs with different images in, to give away.  If you would like to be the lucky recipient, then please just leave a comment below, and I'll choose one person :)

Thank you


Monday, 14 December 2015

The Crafty Countdown continues - 64 days to go

Evening readers.  So, to prove I don't plan (sometimes very annoyingly!!), this little placque morphed as I played and changed my mind.  Trust me, I do get really fed up with myself when I go off something!  It makes a quick project a thing of dreams.

Anyway, the inspiration this time was another MDF placque, and some little hearts.  I thought about what I wanted to do whilst I was trotting round the field with the dogs, and then set to work:


I decided to use a combination of paints, a lovely Lime green, lavender and haystack.  I applied them with a sponge, overlapping the colours slightly.  I then overstamped using a large line stamp, and black ink:


I also used a stamp to create a scalloped border at the top and bottom of the placque:

I then completely fell out with it, as I thought it looked to dark.  So, I added a layer of gesso, and then repainted the MDF.  I then stamped using a blue Distress Ink Paint:


Still wasn't happy!  Honestly, the paint layers.  So now I applied the blue paint from the left, and then dragged white paint in streaks across from the left, and then the right: 


That's better. Phew.  I painted my hearts with white paint, the lovely lime, and the same blue acrylic paint.  I used a swirl stamp "falling off" the placque:

Quite liked this, so decided to pop one on the other side, and then arranged the hearts to see what it looked like;

Still happy!  I looked at the blue heart, and realised the stamped image would look good continued onto the heart, so removed the other embellishments, and stamped onto the heart whilst it was in the finishing position, so I could get the stamp in the perfect position:


I edged my white and lime heart with the blue paint, and the blue heart with white paint.  Happy with my positioning I decided it was time to add a sentiment.  I stamped on white card, and then used the ink pad, which I had used for the scalloped borders, to create a piece of background card with perfect matching colours.


Matt and layer these together, and shape so you have movement in the flag.  Now I decide I want to add more lime green to my placque, for this I used a lid from my water brush. I dried it off a little with a heat gun, and then dragged the paint slightly.  I also painted the top and the edges of the placque with the lime green:


Next I added my ribbon at the top of the MDF placque, and tied two knots on the top of the placque:


Almost there!!  I added the borders, the hearts and the sentiment - but then I decided to add a little detail.  I used my drawing pen to add faux stitching to the borders; swirls to the heart:

And then, to emphasis holes in the border, I used a pipe cleaner.  This is perfect, as the size is right, but also the tiny little hair give it a bit of texture.  I got carried away, and then added lime green circles to the heart with the pipe cleaner!  Blob the paint on and twist the stick!  It looks great:


Finished.....apart from glossy accents on the Vision and the word Heart (this will still be wet in the photo's, but will dry completely clear.  I hope you like it.  I'm chuft with this one....finally :)


Design Team Call Out

This is an extra little post, because, as the title suggests, I'm after a design team!!  Eeek.  Sometime ago I did do a call out, but unfortunately, due to having to close my web site down, I was unable to do anything with all the wonderful applications that came through.

This time, there will definitely be stuff to do!!

I already have one lovely team member, so I am literally just looking for two people, at the moment.  However, I will definitely keep people on a list!  My plan at present, is to have members for 6 months, and then rotate them - this way lots of people will be able to showcase their work (if loads of people actually fancy doing it, of course!! Get me, presuming).

I would like people who are definitely confident with, and love, stamping; die cutting; using masks/stencils; working with paper products.  So, basically, everything!  haha.  If you are amazing at stamping, but hate dies, then please apply, as I may break the team up so people have products to play with that are more specific to their strengths.

I will be continuing with this blog, and will introduce my DT properly, so we will showcase your work, and I'll send you a little interview, so we get to know you properly.

Your work will also be seen on TV (still can't tell you where I'm going :) )....on my Facebook page, Instagram, pinterest - and of course I will always credit you for it.

At the moment, there won't be a fee, I'm afraid.  You will be sent the product to play with, and keep - of course.  This is a new journey for me, so who knows where it'll take us!!

Anyone who's interested, please send me your details, but I also require photo's of some of your work.  If you can send your details to:  leoniepujol@hotmail.co.uk


Sunday, 13 December 2015

Crafty countdown....65 days to go

Hi crafters, thank you for popping on by again!! This blog post is a little tricky to photograph, as its long!! I've gone down the real messy crafting this time - let's see if you like this, or prefer it a little more refined.

I've carried on with yesterday's theme, as I still had stars left, and love using the same products to get a different look. 

 I started with a piece of mdf (not Meg!!) that was already painted:

I arranged the stars and got an idea of layout. I then added stencil detail, using blue paint and a stencil brush 


Once I stencilled the whole mdf pieces I then added gesso with a sponge - this adds texture, but also allows me to see the stencil work underneath:

Next I wanted to use the same stamp I used yesterday, but wanted it to look different, so decided to cut it up:

I matted and layer the stamp images onto card, but the words which were difficult to cut out needed to be stamped directly onto the plaque, so I had to mask of the words I didn't want to ink. This is easily done with a post it note pad:

Next I threaded string through two of the holes, and threaded some of my stars:


The moon (which I have painted silver) was covered in glue, then popped into a tub of flakes. I then suspended it from string which I tied to the string at the top of the placque:

I quite like my swinging little moon:


Oops, I forgot, I also went round some of the swirls created with the stencil, with a black fine tipped drawing pen. This just emphasises the detail a little.

Next, I added my other stars and the words to make up the saying. I added glitter glue, and also glossy accents to the words. I brushed over with white paint to add extra texture to my design, and to give it that rough "sketchy" look.

Gosh, that's it!! To finish I blasted it with a clear super gloss varnish. Because I'm using mdf, the varnish doesn't shine as much as expected, but does give it a more professional finish.....so, smooth or "sketchy and rough"? Have a play, and see what you like :)