
Cut out each snowflake using ivory pearlescent card. Cut out three extra small snowflakes.
Next, using the ivory pearl card, emboss the card using the Message in a Tree, embossing folder from Courture Creations. Very pretty indeed, and looks amazing on pearl card.
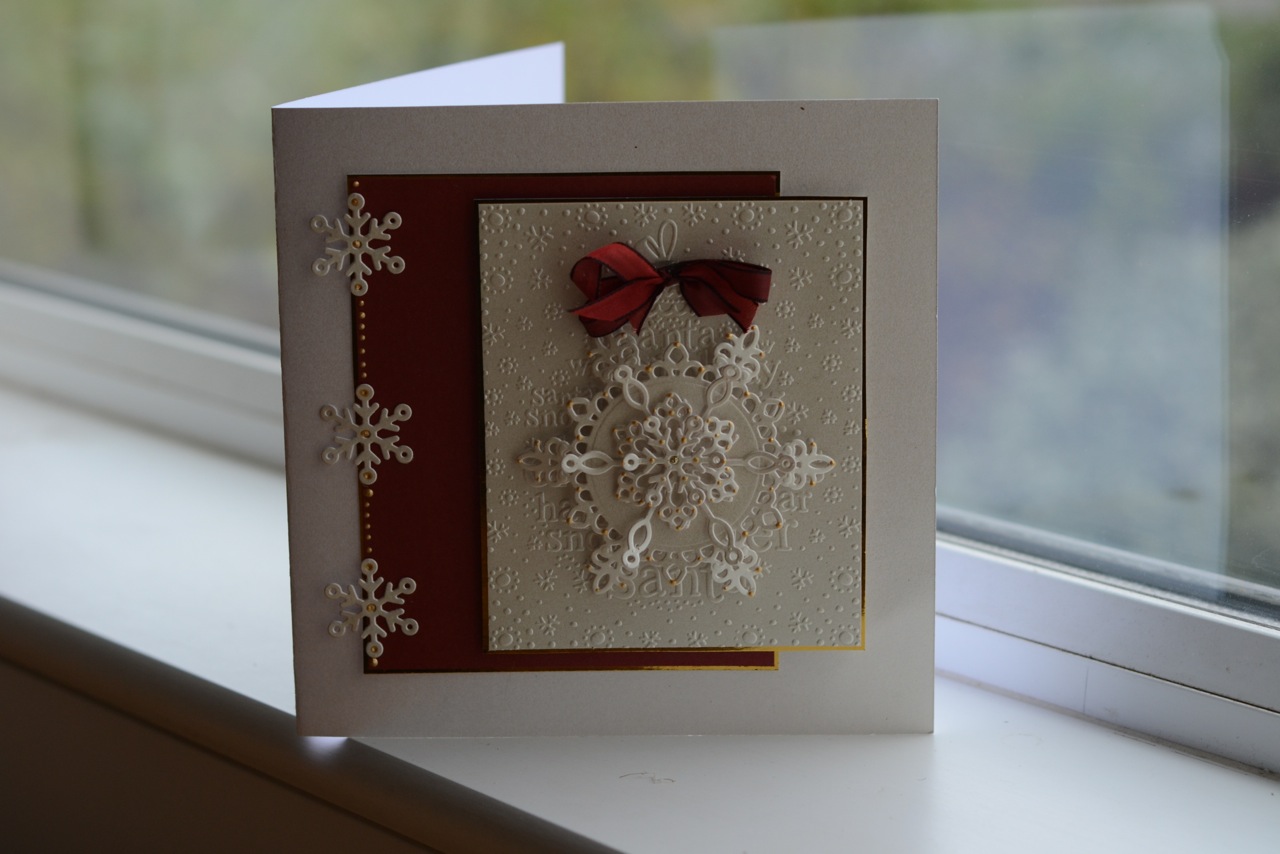
Make a 8"x8" card again using cream pearl card.
Mat and layer a piece of gold mirri card behind the embossed card, then cut a piece of red card slightly larger again.
Attach the red card to the left of the square card. Mat and layer the embossed card so it falls slightly off the red card - I used 3D foam to give it a little lift.
Now attach the snowflakes. You can shape them so it adds dimension to the card. Attach the snowflakes to the card using Pinflair, then attach the smaller snowflakes to the left again using pinflair.
I then added a lovely red ribbon to the top of the bauble using pinflair glue
A tiny amount of stickles glitter glue finishes the card.


5 comments:
This was a wonderful card to make. Thank you. Barbara
Lovely card Leonie.
It was a fab card, and thank you so much for the instructions, the girls will be pleased.
xx
This is fantastic Leonie. I love the gorgeous snowflakes.
Hugs
Linda xxx
Lovely card Leonie, I had a play with the embosser, but not a patch on my Grand Calibur!
Post a Comment